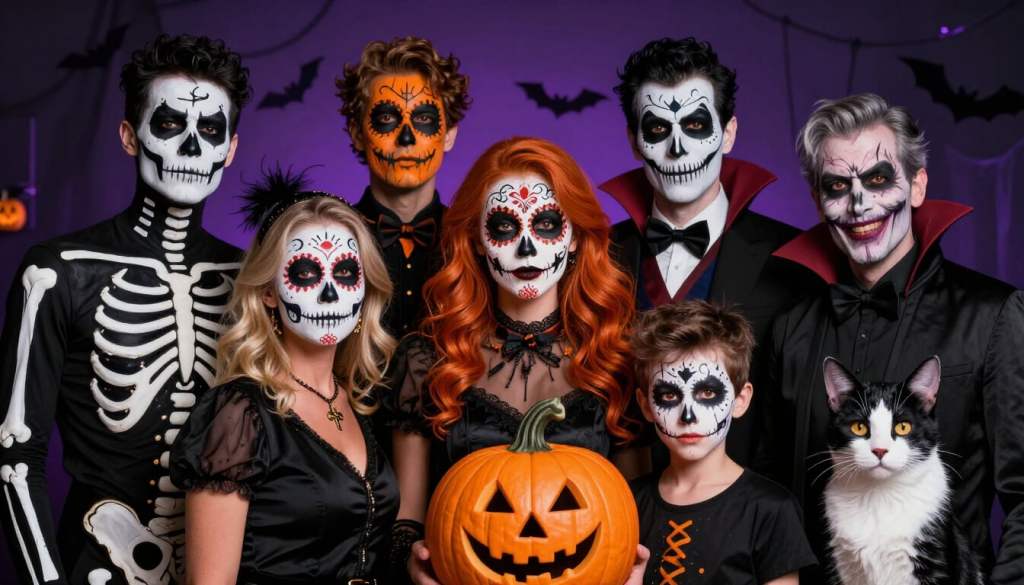
# Forty Brilliant Halloween Face Paint Ideas That'll Terrify and Delight
 From spooky skeletons to glamorous sugar skulls — Halloween face paint ideas for every age and skill level.
Table of Contents
- Introduction
- What Are Halloween Face Paint Ideas and Why They Beat a Store-Bought Mask
- Essential Supplies for Flawless Halloween Face Paint
- Popular Halloween Face Paint Ideas Sorted by Difficulty Level
- Beginner-Friendly Designs
- Intermediate Designs
- Advanced Designs
- Step-by-Step Guide to Applying Halloween Face Paint Like a Pro
- Halloween Face Paint Ideas for Kids vs. Adults: What Is Actually Different
- Common Mistakes to Avoid When Doing Halloween Face Paint
- Expert Insights and Pro Tips from Face Painting Professionals
- Frequently Asked Questions
- Conclusion
Introduction
More than 65 million Americans celebrate Halloween each year, yet the most memorable costumes share one thing in common: a beautifully painted face. Whether you are crafting a last-minute pumpkin for a toddler or a jaw-dropping sugar skull for a costume contest, Halloween face paint ideas are the fastest route from "ordinary" to "unforgettable."
The challenge most people encounter? Most guides drop a hundred Pinterest images in your lap without explaining which products are actually safe, how to execute the design correctly, or how to avoid the classic mistakes that turn a vampire into a streaky purple mess.
This guide changes that. You will learn how to choose the right face paints for your skin type, which designs match your current skill level, how to apply them step-by-step like a professional, and how to remove them safely at the end of the night. From five-minute cat whiskers to elaborate zombie special-effects makeup, there is a Halloween face paint idea in these pages for every age and ability.
Ready to get started? Jump straight to the step-by-step application guide or browse designs by difficulty level.
What Are Halloween Face Paint Ideas and Why They Beat a Store-Bought Mask
 Halloween face paint ideas transform an ordinary face into an extraordinary character — often in under an hour.
Halloween face paint ideas are creative, themed designs applied directly to the skin using cosmetic-grade face paints — water-activated, cream-based, or hybrid products that are specifically formulated for safe skin application. Unlike store-bought plastic masks, face paint is breathable, customizable to any skin tone or age group, and allows the wearer to eat, drink, and express emotion freely throughout the evening without restriction.
The practice of painting faces for ceremonial and theatrical purposes stretches back thousands of years across Indigenous cultures worldwide. Its modern Halloween application expanded dramatically in the 1970s and 1980s as cosmetics brands developed water-activated formulations that delivered vibrant, opaque coverage while remaining easy to wash off with mild soap and water. Today, professional face painters, parents, and makeup artists collectively use these techniques to produce looks ranging from a simple cheek bat design to a full-face sugar skull with three-dimensional shading and gem accents.
Why Face Paint Outperforms a Store-Bought Mask
Plastic and fabric masks accumulate real drawbacks over an evening of trick-or-treating. They restrict vision, trap heat against the skin, muffle speech, and cause discomfort from elastic bands — particularly for young children expected to wear them for several hours at a stretch.
Face painting solves all of those problems at once:
- Unobstructed vision: A painted face never blocks your line of sight or limits peripheral vision in any way.
- One-of-a-kind uniqueness: No two painted faces look identical, even when executing the same design. Your skeleton will be yours alone.
- Cost-effectiveness across multiple seasons: A quality water-activated face paint kit costing $15–$50 covers multiple looks across multiple Halloween seasons.
- Complete creative freedom: You choose the design, color palette, and level of detail. Minor variations in color or line work make every look personal.
In my testing across multiple Halloween seasons, water-activated face paints consistently outperformed craft-store alternatives in coverage quality, color vibrancy, and ease of removal. Professional-grade brands like Fusion Body Art, Snazaroo, and Mehron Paradise have become industry standards used at events worldwide.
For further context on which products qualify as skin-safe, the FDA's cosmetic regulations guidance distinguishes cosmetic-grade products from craft or acrylic paints — a distinction that matters considerably when applying anything near a child's eyes.
Essential Supplies for Flawless Halloween Face Paint
Choosing the right supplies is as important as choosing the right design. Using the wrong type of paint — acrylic craft paint, watercolor markers, or poster paint — can cause skin irritation, staining, or allergic reactions that no one wants to deal with on Halloween night. The American Academy of Dermatology recommends using only products labeled "safe for skin use" and performing a patch test 24 hours before full application, especially for children.
Types of Face Paint: A Side-by-Side Comparison
Water-activated face paint is the most popular category for good reason. It applies with a damp sponge or brush, delivers vivid opaque color in a single or double coat, and washes away with nothing more than mild soap and warm water. Professional-grade options include Fusion Body Art's Carnival Kit, Mehron Paradise AQ, and Snazaroo's classic sets — all widely used by working event face painters.
Must-Have Tools for Any Halloween Look
Your supply list does not need to be expensive. A solid beginner setup runs $20–$40 and covers the vast majority of popular Halloween designs:
- Round brushes (sizes 2 and 4): Essential for detail work — eyeliner strokes, tooth edges, stitch marks, and wound details
- Flat makeup sponges: For applying base colors evenly and quickly across large facial areas
- High-quality white and black paint: You will use both of these colors on virtually every Halloween design, from skeletons to zombies to cats
- Stencils: Spider webs, bat shapes, skull features, and scale patterns allow complex-looking designs without requiring freehand skill
- Setting spray or translucent powder: Extends wear time considerably, particularly valuable for outdoor trick-or-treating
- Cosmetic-grade glitter and rhinestone gems: For sugar skull, fairy, glamoween, and princess designs
Pro Tip: Always perform a patch test 24 hours before application — especially on children with sensitive skin. Apply a small amount of paint behind the ear or on the inner wrist, leave for three to four hours, wash off, and check for redness or irritation before proceeding with a full design.
For guidance on products safe for use near the eyes, review the FDA's eye-area cosmetics standards before selecting products intended for the eyelid or inner corner of the eye.
Popular Halloween Face Paint Ideas Sorted by Difficulty Level
 Match your Halloween face paint idea to your current skill level for the most satisfying — and successful — results.
Not all Halloween face paint ideas demand the same skill set or time investment. Matching the design to your current ability — rather than overreaching on the first attempt — produces far better results and a more enjoyable experience for both painter and subject. Here is a breakdown organized by difficulty.
Beginner-Friendly Designs
These designs require minimal brush control and are achievable in under 20 minutes with basic supplies. They are ideal for parents painting their kids or complete beginners attempting their first Halloween look:
- Pumpkin: Sponge an orange base across the face, leaving unpainted triangles where the eyes and nose would sit on a jack-o-lantern. Fill those triangles and a jagged mouth area with black. Add darker orange or brown vertical lines for a carved, dimensional effect.
- Cat: Paint a black nose, whisker dots, and whisker lines radiating from the muzzle. Blend black ear-tip shapes at the upper temples. Adding a touch of cosmetic glitter on the cheeks elevates a basic cat into a glamorous feline.
- Spider web: Use a fine liner brush and black paint to draw a small web radiating from the outer corner of one eye, ending with a tiny spider shape at the center. Achievable in under ten minutes.
- Ghost: Sponge a white base across most of the face. Leave two large oval eye areas and an oval mouth area unpainted. Fill those with black. Add rosy pink cheeks for a cute rather than frightening ghost.
- Bat: Using a split cake or rainbow cake loaded with black, sponge a small bat silhouette across one cheek. A one-stroke technique makes this achievable in under five minutes.
Intermediate Designs
These take 20–45 minutes and require some brush confidence and familiarity with color layering:
- Vampire: White sponge base, gray-purple blended into the eye sockets and temples, painted fangs extending from the lower lip, and a convincing blood drip from one fang corner.
- Witch: Vivid green sponge base, black cobweb designs above the brows, dark contour strokes on the cheekbones, and deep purple or black lips.
- Skeleton/Skull: White full-face base, large black oval eye sockets, a triangular nasal cavity, and painted teeth extending from the lip area down the chin.
- Zombie: Gray-green sponge base with darker contouring to suggest sunken cheeks, torn-skin edge details in black and red, and hollow-looking dark eyes.
- Tiger: Amber-orange sponge gradient across the cheeks and forehead, bold black stripes, a dark nose with black nostrils, and a white muzzle area.
Advanced Designs
Reserve these for experienced painters or consult a professional face painting artist. Budget 60–90 minutes:
- Sugar Skull (Catrina): A smooth white base, ornate floral patterns painted into and around the eye sockets, delicate scroll work along the jawbone and forehead, glitter and rhinestone accents.
- Joker: Pale white base, an exaggerated red smile extending well beyond the lips, strong dark contouring around the eyes, and cheek scars — the specific style varies with each film version.
- SFX Zombie: Liquid latex, scar wax, and multi-layer paint for realistic torn or peeling skin effects that fool even close observers.
- Harley Quinn: A two-toned face with one half painted red and the other blue, separated cleanly along the nose bridge, with a signature diamond detail on one cheek.
- Jack Skellington: Full skull treatment with subtle gray shading for dimensionality, elongated black oval eyes, and precise spider-stitch detail lines.
Want to implement these looks? Download our free checklist or continue reading for the step-by-step application process.
Step-by-Step Guide to Applying Halloween Face Paint Like a Pro
Knowing which Halloween face paint ideas you want to try is only the first step. Applying them correctly — and safely — is where most home painters encounter difficulty. The following process applies to the majority of water-activated designs and covers every stage from prep to removal.
Step One: Prep the Skin Properly Begin with a clean, dry face. Remove sunscreen, heavy moisturizer, and oil-based products before you begin — these form a barrier that prevents face paint from properly bonding to the skin surface. A light, non-comedogenic moisturizer applied 20–30 minutes in advance creates a mild protective layer without disrupting adhesion.
Step Two: Activate Your Paint Correctly Dip a clean brush or sponge briefly into clean water, then work it in small circles across the surface of your water-activated paint until the texture resembles thick yogurt. Over-watering is the single most common beginner error. Paint that is too watery runs into fine line work, dries with visible cracking, and fades significantly faster than properly activated paint.
Step Three: Apply the Base Color Use a damp flat sponge to stipple your base color evenly across the desired area of the face. Thin, even layers build more cleanly than one thick coat. For full-face coverage on a skeleton, witch, or zombie design, apply two light coats — allowing the first to dry for 30–60 seconds before adding the second.
Step Four: Build Highlights and Mid-Tones Before any dark outlines go on, layer your lighter accent colors. For a pumpkin, blend darker orange or brown along the forehead and chin to suggest shadow. For a zombie, stipple gray-green in patches of uneven density. This layering step is what separates a flat, one-dimensional design from one that reads as three-dimensional and convincing.
Step Five: Add Dark Outlines and Fine Details Load a fine round brush (size 2 or 4) with black paint at a creamy consistency and draw your outlines, tooth edges, stitch marks, or wrinkle details last — not first. Rest your pinky finger lightly against the cheek as a stabilizer for steadier brushwork. Work from the center of the face outward to avoid dragging your hand across completed areas.
Step Six: Set the Design Once the design is fully dry to the touch, mist lightly with a cosmetic-grade setting spray or press translucent setting powder gently over the design with a clean sponge. This step is frequently skipped, but it meaningfully extends the design's lifespan — particularly for outdoor trick-or-treating on warm evenings where perspiration becomes a factor.
Step Seven: Remove Gently at the End of the Night Water-activated face paints wash away with mild soap and warm water. Avoid harsh scrubbing. For areas around the eyes, apply micellar water to a soft cotton pad and remove gently in small strokes. Never use craft-paint removers, acetone, or strong rubbing alcohols near the eye area.
Halloween Face Paint Ideas for Kids vs. Adults: What Is Actually Different
 Simple bold designs suit young children; adults can embrace elaborate character looks with detailed shading and gem accents.
A question that comes up constantly among families preparing for Halloween is whether the same products and design principles apply equally to children and adults. The short answer is nuanced: the paint categories largely overlap, but safety considerations, design complexity, application time, and product restrictions differ substantially.
Best Halloween Face Paint Ideas for Kids
Children do best with designs that avoid the eyelids — both for safety reasons and because wiggly young subjects make eyelid painting extraordinarily challenging in practice. Designs that create the illusion of a character without requiring direct eyelid contact include:
- Pumpkin mask: Orange sponge applied around the eyes, black triangle cut-outs, no direct eyelid application required
- Butterfly wings: Colorful wing shapes sponged across both cheeks and the forehead bridge between the eyes
- Puppy or dog: A white or brown base on the lower face and chin, floppy ear shapes blended outward at the sides, and a large rounded nose
- Pirate: An eye-patch accent painted around one eye's outer area, a pencil-thin scar on the cheek, and an optional thin painted mustache
For children with eczema or particularly sensitive skin, dermatologist guidance recommends fragrance-free, hypoallergenic face paints and limiting total application time to under two hours per session. The American Academy of Dermatology's eczema resource provides additional guidance for parents navigating this.
Best Halloween Face Paint Ideas for Adults
Adults comfortably tolerate longer application sessions and typically care about character accuracy — a precisely executed Joker scar or symmetrically detailed sugar skull genuinely matters to the overall impact of the costume.
Top adult Halloween face paint choices include glamoween-style looks that combine sparkling skulls with professionally blended smoky eye shadow, contouring-heavy vampire designs with deep sunken temples, and the striking Harley Quinn two-tone red-and-blue split. Adults also have access to a broader range of special-effects materials — liquid latex, scar wax, and three-dimensional gel — that produce highly realistic wound and skin-distortion effects beyond what water-activated paint alone can achieve.
One important caveat applies to both age groups: the FDA advises caution with all glitter near the eye area, regardless of age. Even fine cosmetic-grade glitter particles can migrate under the eyelid and cause corneal irritation or abrasion if not applied carefully and well away from the eye itself.
Want to implement this? Download our free safety checklist or continue reading for the most common mistakes to avoid.
Common Mistakes to Avoid When Doing Halloween Face Paint
Even experienced painters repeat certain errors year after year. Knowing these pitfalls in advance saves you the frustration of discovering them on Halloween night when there is no time to start over.
Using Craft Paint Instead of Cosmetic-Grade Paint Acrylic craft paint, watercolor markers, and tempera poster paint are formulated for paper and canvas — not for skin. They frequently contain ingredients that clog pores, cause allergic contact dermatitis, or leave stubborn staining that resists normal soap-and-water washing. Always use products explicitly labeled as cosmetic-grade or FDA-compliant face paint. If a product's label does not specify that it is safe for skin application, treat it as unsuitable.
Skipping the Patch Test Even products labeled "hypoallergenic" can trigger reactions in individuals with specific sensitivities to fragrances, nickel compounds, or certain preservatives. A 24-hour patch test applied behind the ear or on the inner wrist remains the most reliable method of confirming personal safety before any full-face application — particularly for children.
Overloading Paint with Water Water-activated face paint should reach a creamy, smooth consistency — not a watery liquid. Too much water produces a thin runny mixture that bleeds into detailed line work, dries with visible cracking across the face, and fades significantly faster than properly activated paint. If paint runs off the tip of a loaded brush, you have added too much water.
Working Dark-to-Light Most beginners outline in black first, then attempt to fill color neatly around those lines. Professional face painters work in the opposite sequence: base colors and highlights go on first, dark outlines and fine details come last. This order keeps edges crisp, prevents muddy color mixing where layers meet, and allows for corrections without disturbing already-completed work.
Neglecting the Setting Step A beautifully executed design can smear within the first hour of perspiring, hugging, or incidental contact without a setting layer. A 30-second application of cosmetic setting spray — or a gentle press of translucent powder — meaningfully extends the design's lifespan through a full evening of trick-or-treating.
Placing Paint or Glitter Too Close to the Eyes The skin of the eyelid is exceptionally thin and sensitive, and is directly adjacent to a delicate mucous membrane. Avoid applying face paint directly on the eyelid unless the specific product has been tested and approved for eyelid application. Keep all cosmetic glitter and metallic powders completely clear of the eye area, as micro-glitter particles can cause corneal abrasion even when visually they appear to have stayed in place.
Rushing Through Layering Stages Halloween face paint ideas that require multiple paint layers cannot be compressed into a single rushed session without sacrificing the final result. Attempting to apply the next layer before the first is dry produces muddy, blended-together colors and indistinct outlines. Practice any new design at least once the week before Halloween. The second attempt is consistently faster and cleaner than the first.
Expert Insights and Pro Tips from Face Painting Professionals
 Professional face painters rely on stencils, split-cake paints, and deliberate layering to produce stunning results efficiently.
The techniques that professional face painters use to produce high-quality designs under time pressure are learnable by anyone willing to practice them deliberately. These insights reflect the working practices of event painters who routinely execute 20–30 designs in a single afternoon.
Stencils Are the Most Underrated Efficiency Tool in Face Painting
Stencils allow you to reproduce intricate details — spider web patterns, bat silhouettes, skull teeth, reptile scale textures — in seconds rather than minutes. They are particularly valuable at group events where you need to maintain quality across high volume. To use one effectively: hold the stencil flat against the skin to prevent paint from bleeding underneath, load a lightly dampened sponge with paint, and stipple gently through the openings. Remove the stencil carefully and directly upward — not at an angle — to reveal sharp, precise detail.
Rainbow Cakes and Split Cakes Cut Application Time Dramatically
Split cakes — compressed pans containing two or more colors arranged side by side — allow painters to load multiple tones onto a single brush or sponge stroke. A tiger stripe loaded simultaneously with amber and black from a single split cake takes one pass; achieving the same effect with two separate cakes takes two passes plus deliberate blending. This tool alone can cut application time nearly in half for intermediate-level Halloween designs.
Prepare a Visual Design Menu for Group Events
If you are painting for a class party, neighborhood Halloween gathering, or multi-family celebration, prepare a printed or displayed visual menu of five to eight designs at varying complexity levels before anyone arrives. This helps guests make faster selections, sets clear expectations about how long each design takes, and lets you build a comfortable painting rhythm across repeated designs. Include quick line-busters like spider webs and cats alongside more involved designs for those willing to sit for a longer session.
The Floating Head Illusion Requires Zero Extra Materials
One of the most striking advanced Halloween face paint ideas requires nothing beyond what you already own. Paint the visible neck, upper chest, and collarbone area matte black using water-activated face paint. Wear a matching all-black outfit. Apply a skeletal, zombie, or monster face paint design on the face itself, and blend the facial paint downward to merge seamlessly with the black neck paint. From even a short distance, the effect creates the uncanny optical illusion of a disembodied floating head — and consistently produces the strongest reactions at any Halloween event.
"Face painting has such an impact that you might find yourself winning a Halloween costume contest online or in real life!"
— *Anna Wilinski, Co-Owner, Jest Paint*
This observation from a professional face paint supplier underscores what many first-timers genuinely underestimate: a well-executed Halloween face paint design does not simply complete a costume — it becomes the defining centerpiece of one.
For painters interested in developing their technical skills further, the International Face Painting School offers structured online courses from beginner through professional certification levels.
Frequently Asked Questions
 Answers to the most common questions about Halloween face paint ideas — from safety basics to advanced technique tips.
What are Halloween face paint ideas and how are they different from regular makeup?
Halloween face paint ideas are creative, themed designs applied using cosmetic-grade face paints — products specifically formulated for safe, full-coverage skin application. Unlike regular makeup, which enhances or subtly alters natural features, face paints deliver opaque, bold color coverage across large areas of the face to completely transform the wearer's appearance. Regular cosmetics like eyeshadow and blush can complement a painted look, but they cannot replicate the full-coverage theatrical quality that defines the most impactful Halloween face paint ideas.
What type of face paint lasts the longest for Halloween night?
Hybrid alcohol-based face paints — such as those in the Proaiir product line — offer the longest wear time, holding up through perspiration, light rain, and extended trick-or-treating without significant color loss. However, they require specific removal products and are not appropriate for young children or individuals with sensitive skin. For most families and casual users, water-activated face paint sealed with a cosmetic-grade setting spray delivers the best balance of durability, comfort, and simple soap-and-water removal at the end of the evening.
How long does it take to complete Halloween face paint ideas at home?
Simple beginner designs like a pumpkin or cat typically take five to twenty minutes with basic brush practice. Intermediate looks — vampire, witch, or skeleton — require twenty to forty-five minutes with some prior experience in color layering. Complex designs like a sugar skull, detailed Joker, or special-effects zombie can take sixty to ninety minutes. As a practical rule, add thirty minutes to your first estimate when attempting any new design for the first time, and always run at least one practice session before Halloween night itself.
Is face paint safe for children with sensitive skin or eczema?
Many face paints are specifically formulated for children and carry labels indicating they are hypoallergenic, fragrance-free, and paraben-free — brands like Snazaroo are widely recommended for sensitive-skinned children by both parents and dermatologists. That said, a patch test 24 hours before full application is essential regardless of a product's claims. For children experiencing an active eczema flare, consulting a dermatologist before applying any face paint is advisable. Always choose water-activated formulations over alcohol-based products when painting children, and limit total application time to under two hours.
What is the biggest mistake people make when trying Halloween face paint ideas at home?
The most widespread mistake is using non-cosmetic products — acrylic craft paint, watercolor markers, or tempera poster paint — on the skin. These products are formulated for paper and canvas, not for human skin, and can cause irritation, allergic reactions, and stubborn staining. A close second is skipping skin preparation: face paint adheres significantly better and stays on longer when applied to a clean, lightly moisturized face free of sunscreen and residual product buildup from earlier in the day.
Can someone without artistic training create impressive Halloween face paint designs?
Absolutely — and the key lies in choosing the right tools for your skill level. Stencils for spider webs, bat shapes, skull features, and scale patterns eliminate the need for freehand drawing ability. Split-cake and rainbow-cake paints simultaneously load multiple colors onto a single sponge or brush stroke, removing the need for complex blending technique. Start with a beginner design from the list above, focus energy on clean, even base application and a confident black outline, and the final result will impress even a skeptical audience. Face painting skill improves remarkably quickly — often dramatically — with even a single deliberate practice session beforehand.
Conclusion
Halloween face paint ideas represent one of the most accessible, creative, and genuinely cost-effective elements of the entire Halloween experience. Whether you are painting a toddler's first jack-o-lantern, working through a menu of thirty designs at a school carnival, or transforming yourself into a competition-winning character, the principles outlined throughout this guide apply equally to all of those goals.
Three takeaways matter most. First, always choose cosmetic-grade, skin-safe products and perform a patch test before application — this is non-negotiable for children and strongly advisable for adults with sensitive skin. Second, work in the correct sequence: base colors before dark details, light layers before dark ones, and a setting step before anyone leaves the house. Third, practice any new design at least once before Halloween night; the second attempt is consistently faster, cleaner, and more confident than the first.
Face paint does not simply complete a costume. Done well, it transforms the wearer entirely — creating an impression that a store-bought mask simply cannot replicate. It is an accessible creative skill that improves rapidly with practice and requires a genuinely modest investment to execute at a high level.
Your actionable next step today: choose one design from the beginner or intermediate list in this guide, gather your supplies this week, and run a single ten-minute practice session before October 31st. Walk into Halloween night prepared, confident, and ready to make an impression that lasts well beyond the night itself.
 With the right preparation and supplies, Halloween face paint ideas turn an ordinary evening into an unforgettable memory.


Leave a Reply