
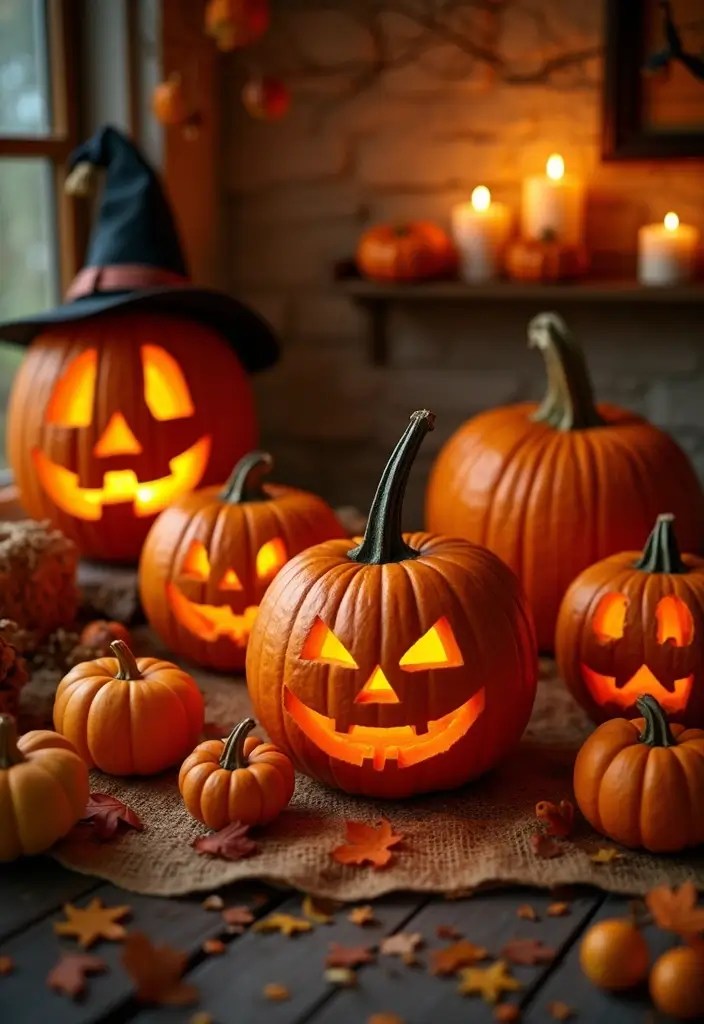
Halloween isn’t complete without the glowing magic of Jack-o-lanterns! From spooky carved pumpkins to whimsical designs and creative lantern displays, these festive pumpkin ideas will transform your porch, garden, or party space into a true Halloween spectacle. Whether you’re looking for scary, funny, or elegant designs, this guide to the best Jack-o-lantern spectacles will spark your imagination and make your Halloween unforgettable.
If you’re the kind of reader who loves quick crafts, family projects, or party setups that wow without stress, this one’s for you. You care about safety, simple steps, and design that fits your space. You’ll also want ideas you can pull off with a few common tools and a little patience.
Here you’ll get ten spectacle ideas that mix classic pumpkin carving with clever paints, stencils, and light tricks. They cover bold faces, cozy silhouettes, and witty themes. Each idea hints at the materials and a quick order of steps so you can start fast.
Every idea comes with a practical start. Decide on a theme, pick a pumpkin shape, gather a few tools, and pick a lighting plan. You’ll see options from simple etched patterns to colorful paint textures and safe LED candles. The goal is to make the glow steady and bright without a ton of fuss.
Real talk: Halloween weather can be fickle. That means use weatherproof sealant, washable paints, and glow-safe finishes. I’ll mention a few easy tricks, like using stencils, pre-made face templates, and a spare pumpkin for test runs. These touches help your display hold up through a chilly night.
So grab a pumpkin, a small set of tools, and a hot mug of cider. With these ideas, you’ll transform your porch into a scene that’s warm, spooky, and share-worthy. I’m excited for you to try one or two, tweak them to fit your space, and watch neighbors stop to admire the glow.
Contents
- 1. The Classic Haunted House
- 2. The Whimsical Pumpkin Fairy
- 3. The Spooky Tree
- 4. The Intricate Lace Design
- 5. The Nature Scene
- 6. The Whimsical Monster
- 7. The Movie Character
- 8. The Ghostly Silhouette
- 9. The Floral Fantasy
- 10. The Pumpkin Stack
1. The Classic Haunted House
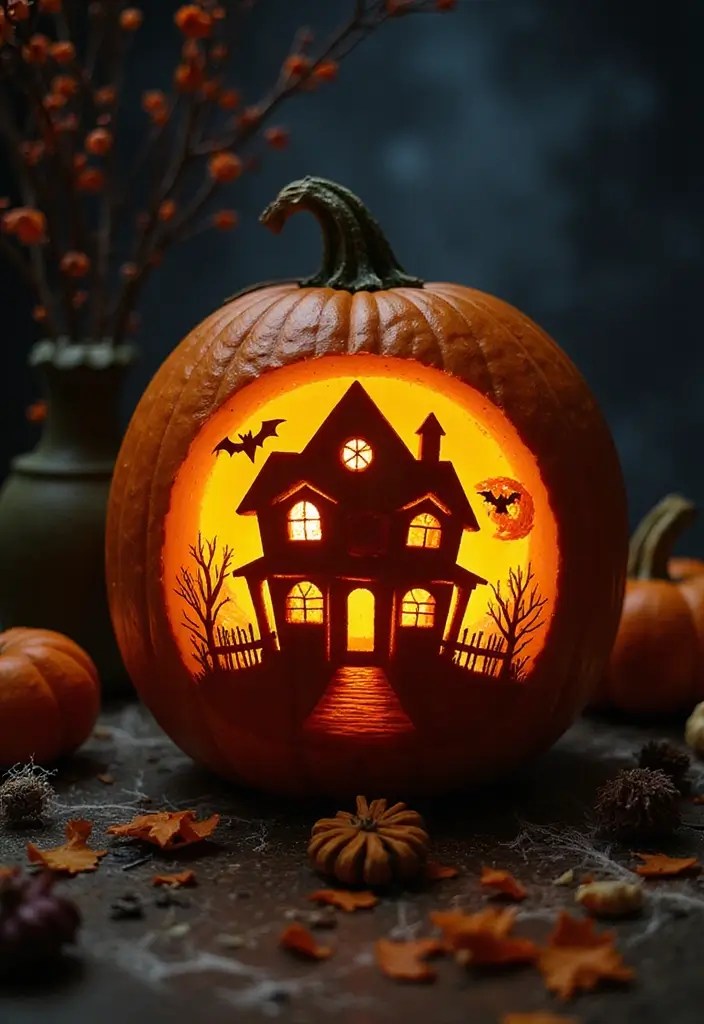
You want a Jack-o-lantern that tells a spooky story. The classic haunted house scene does that with simple steps and clear details. Start by sketching a crooked house: a jagged roof, uneven windows, and a door that creaks. Add a ghost peeking out, a bat circling, or a bare tree beside it. Lighting from inside makes the glow flicker, turning your pumpkin into a real night-time scene.
– Sketch and layout – Map the house with a pencil first. Keep the roof line uneven. Decide where the windows and door sit so you can cut cleanly.
– Carving tips – Use a small tool for sharp lines. A drill helps make square windows or a rounded door with clean edges. Cut from the outside for safety.
– Lighting and finishing – Use a safe LED or flicker light inside. A warm yellow glow works well. Place the ghost or tree so they stay visible when lit.
– Roof and texture – A pointed roof reads as classic Halloween. A sagging roof adds creepiness. Add wood grain with light gouges to give a weathered look.
– Display and care – Put the pumpkin where it’s seen by trick-or-treaters. Keep it shaded, away from sun, and check for soft spots daily to avoid rot.
Product Recommendations –
2. The Whimsical Pumpkin Fairy

If you want a pumpkin that feels magical, try a whimsical fairy design. It adds fantasy to fall decor without being over the top.
– Plan the scene: Sketch a fairy in mid-flight, and frame her with stars and a crescent moon.
– Carve with depth: Use shallow cuts on the outer rind and deeper cuts where you want shadows.
– Light it up: Place LEDs in warm white plus a cool color like teal or purple for a twinkling glow.
– Add fine details: Use a fine gouge for wing veins and tiny stars, then clean up the edges so light shines through clearly.
– Display smartly: Set the pumpkin where you can see it from inside and outside for the most magic.
– Finish with subtle touches: Transfer wing shapes and tiny details, then tidy edges so the light glows evenly.
– Display and care: Place the jack-o-lantern on a stable base and, if outdoors, add a weather sealant to help it last.
– Safety reminder: Never leave lit pumpkins unattended, and keep cords and lights away from wet areas.
This approach creates a ready-to-show whimsical pumpkin fairy that delights guests of every age and elevates your Halloween setup with charm, depth, and a gentle glow.
Product Recommendations –
Park Halloween LED Pumpkin Lights Battery Operated – Orange Pumpkin
Pumpkin Carving Kit Tools Halloween, Professional Heavy Duty Carving Set
Aleene’s Spray Finish 6oz Acrylic Sealer, 6 Ounce (Pack of 1), Clear-Matte
🎁
3. The Spooky Tree
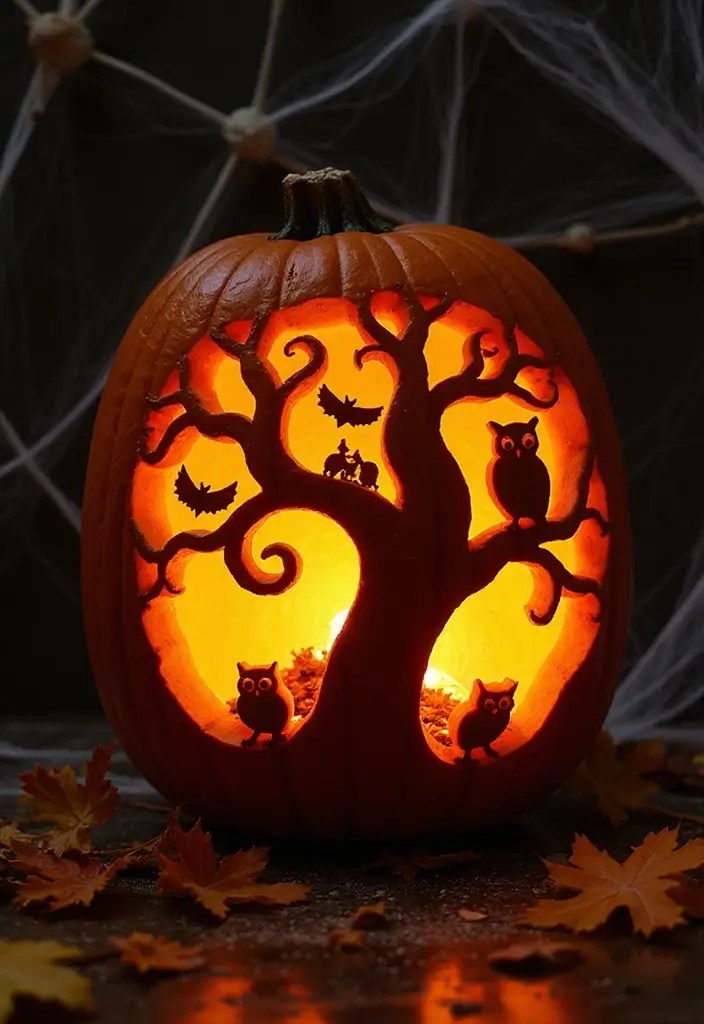
Want a front porch that feels haunted without a lot of work? The Spooky Tree turns a single pumpkin into a living scene.
This design blends carving and painting, so you can control how eerie it becomes. You’ll start with a sturdy pumpkin and let your creativity run from simple to intricate.
Materials
– Large pumpkin, carving kit with saw and gouges
– Black and dark brown acrylic paint
– Glow-in-the-dark paint
– Small brushes and toothpicks for fine lines
– Battery LED candle or a tiny string of lights
– Clear sealer or weatherproof varnish
– Optional: fake leaves, moss, or faux vines
Step-by-step
– Sketch the outline of a gnarled tree across the pumpkin’s face.
– Carve the trunk and twisting branches, varying depth to add shadow and texture.
– Add owls, bats, or faces tucked into the trunk for a subtle scare.
– Paint the design, letting carved edges show through with darker browns and blacks.
– Apply glow-in-the-dark paint to key features like eyes, branches, or a moon glow.
– Seal the surface to protect it from rain and fading.
– Place a battery light inside to cast eerie shadows on your porch.
This spooky tree design gives you a haunted vibe that’s visible from the street and easy to maintain. It’s a practical, striking Halloween decor idea for any porch size.
Product Recommendations –
4. The Intricate Lace Design
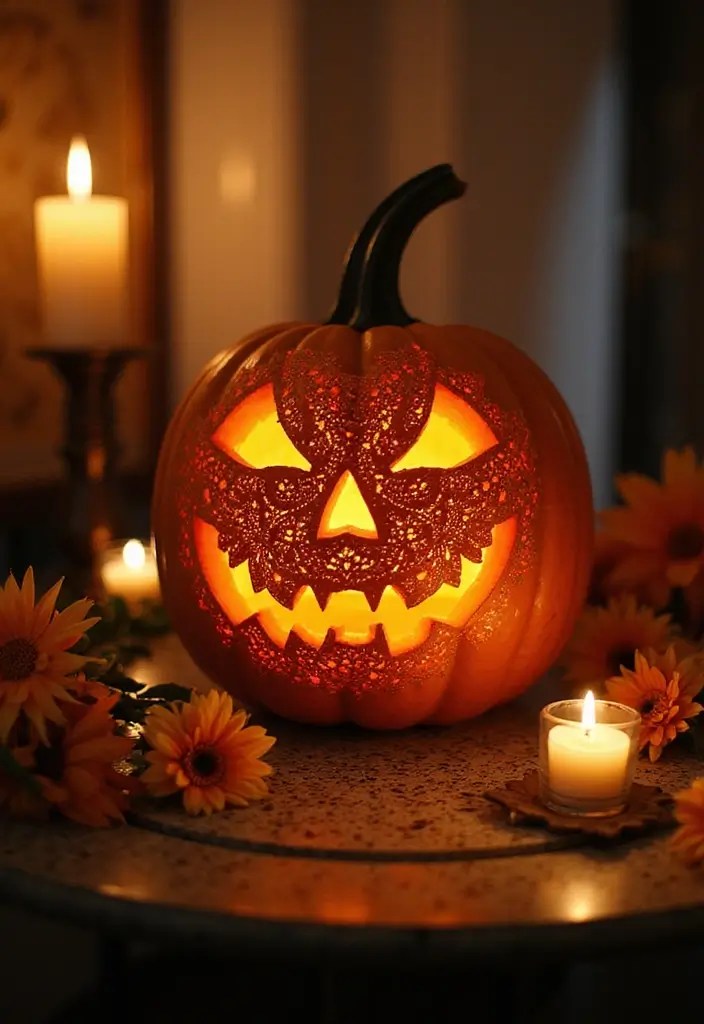
You want a Halloween pumpkin that looks classy and unique. A lace-inspired carving adds that touch. It uses fine lines and tiny openings to create a delicate look. When you light it, the pattern glows like real lace.
Plan before you cut. A lace pattern includes swirls and floral bits. Practice on paper first. Use a stencil to keep lines steady and the design symmetrical.
Steps to get it right:
1) Pick a pumpkin with a smooth surface.
2) Trace a lace pattern from paper onto the pumpkin.
3) Tape the pattern so it stays in place.
4) Carve with a sharp, fine blade, moving slowly along every line.
5) Remove the cutouts and clean the inside walls so light shines through clearly.
6) Add a small LED light or battery-powered candle.
7) Check the glow from different angles and adjust depth if needed.
Tips for a clean finish:
– Hold the blade at a gentle angle to avoid tearing.
– Make shallow passes to keep the skin intact.
– Use a stencil for symmetry and even gaps.
– Light it up after carving to see where the glow needs more contrast.
Why it works: This lace design stands out from standard jack-o-lanterns. It fits fall decor and looks great on a mantel or table centerpiece. The soft glow adds warmth to a chilly night.
Elevate your Halloween with a lace-inspired Jack-o-lantern! A little planning and creativity can turn your pumpkin into a stunning masterpiece that glows with elegance and charm.
Product Recommendations –
Pumpkin Masters Premium All in One Carving Kit – Comprehensive Halloween
5. The Nature Scene
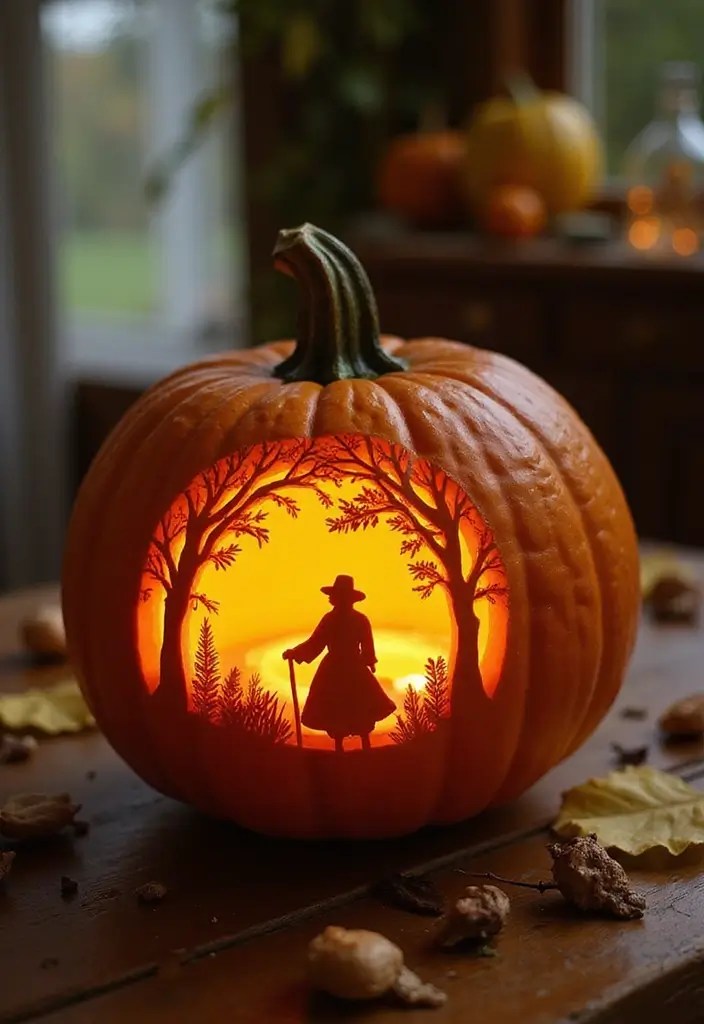
You want a jack-o-lantern that feels alive on Halloween. A nature-scene pumpkin brings autumn to your porch with calm beauty. It’s simple, memorable, and a little unexpected.
Start with a plan. Picture a sunrise over gentle hills. Add trees with leaves turning orange and gold. A quiet lake reflects the colors. Let the landscape flow from side to side, so your eye moves naturally across the scene. You can add a small bird in flight or a distant boat for extra life.
Lighting and materials
– Use warm, natural lights in orange or soft yellow. They mimic dawn and keep the mood gentle.
– Place real leaves, twigs, or moss around the base for texture and an earthy feel.
– Keep the glow steady with a timer so you don’t have to hover by the pumpkin all night.
Planning and carving steps
– Choose a pumpkin with a smooth shell and a size that fits your scene.
– Sketch the landscape on paper, then transfer faint marks to the pumpkin.
– Carve the hills and trees with clean, shallow cuts for a soft look; carve the sun and lake with deeper lines for contrast.
– Seal the carved surface if it will stay outside, and use a safe battery light for quick setup.
This approach gives you a striking, nature-inspired jack-o-lantern that fits any porch and celebrates autumn daily.
Transform your Halloween with a nature scene jack-o-lantern! A touch of autumn beauty can create a cozy atmosphere that’s simple yet unforgettable. Let your creativity flow and watch your porch come to life!
Product Recommendations –
You might also like
15 Hauntingly Beautiful Halloween Centerpieces That Will Wow Your Guests!
15 Spooktacular Halloween Porch Ideas That Will Give Your Neighbors Chills!
6. The Whimsical Monster
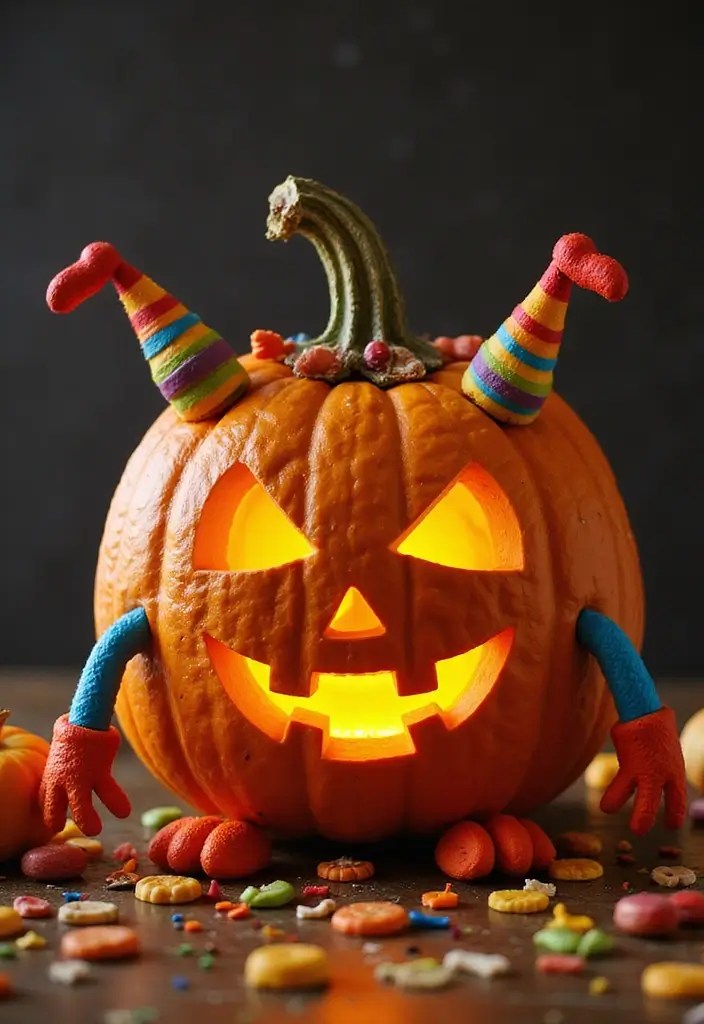
Want a jack-o-lantern that kids approach with smiles? A whimsical monster is the perfect fit. It’s friendly, bright, and easy to make. With goofy eyes and a big grin, it looks welcoming, not scary.
This design works on carved pumpkins and painted ones alike. You can mix textures for a lively look, from smooth paint to tiny felt pieces. The glow from a safe LED light inside gives the monster a friendly shine. Kids can help place eyes and paint tiny details.
What you’ll need
– Choose a clean pumpkin for decorating.
– Gather bright paints, markers, and a few goofy eyes.
– Get a battery-powered LED light for a gentle glow inside.
– Have craft glue or tape on hand for attaching features.
– Pick a tiny hat or crown for extra charm.
Steps to create your whimsical monster
1) Plan a friendly face with big round eyes.
2) Pick bold colors, like green skin and a pink tongue.
3) Add a goofy grin and a touch of blush on the cheeks.
4) Attach a hat or paper crown for extra charm.
5) Place a safe LED inside and test the glow.
This cheerful monster will attract families and spread joy on Halloween night.
A whimsical monster jack-o-lantern brings smiles, not screams! Get the kids involved to create a friendly face that lights up Halloween with joy and creativity.
Product Recommendations –
7. The Movie Character
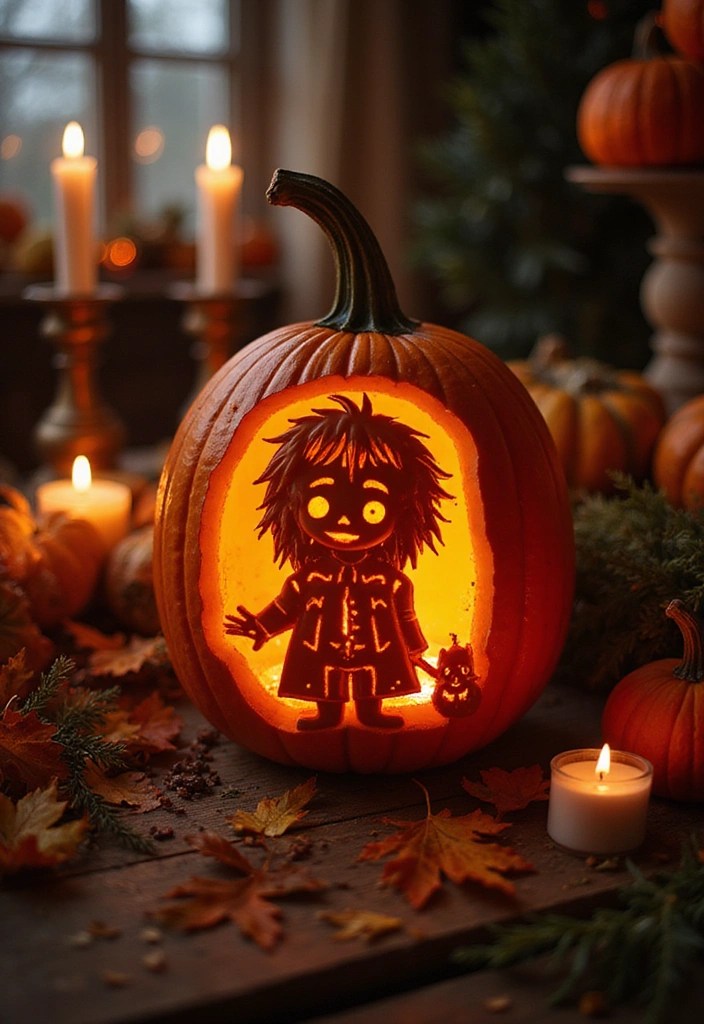
Want a Halloween pumpkin that shows your movie love without looking plain? Carving a Jack-o-lantern as a movie character gives you a bold centerpiece. It’s more than a face; it starts conversations. You can pick a hero, a villain, or a sidekick, as long as the features are easy to spot. The result feels fresh and personal. It’s easy to update every year with a fresh twist today.
– Choose a character with clear, recognizable features.
– Find reliable reference images online.
– Sketch the main shapes on the pumpkin first.
– Carve a simple outline, then add details.
– Use paints or markers after carving to highlight features.
– Light from inside to let the glow show.
Start with bold features that read from a distance. Cut larger shapes first, then refine as needed. Shade by removing shallow layers for depth. Add color with paints after carving to make features pop. Place the light to the back for even glow. Practice on a spare pumpkin to build confidence.
This approach helps you create a movie character pumpkin fans will love. Share photos from your setup to spark ideas in others. Enjoy the glow and the cheers. Your friends will want to try it.
Product Recommendations –
8. The Ghostly Silhouette
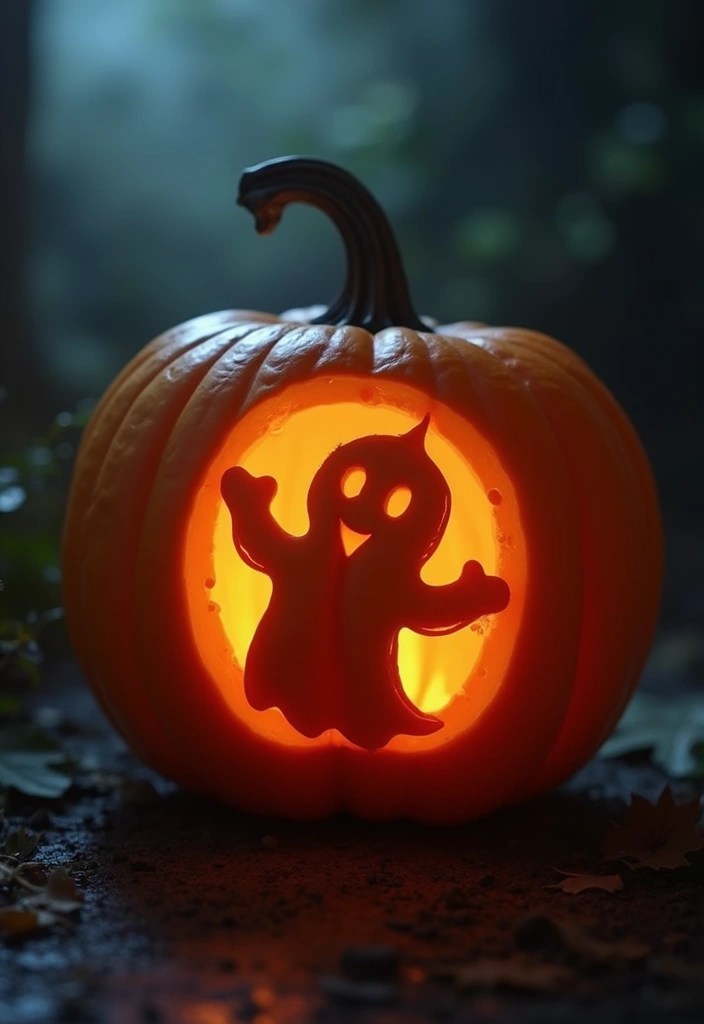
You want a Halloween Jack-o-lantern that blends classic charm with a spooky edge. The Ghostly Silhouette delivers that clean, eye-catching look.
– Start with a smooth pumpkin. A round, even surface makes carving easier.
– Sketch a ghost floating inside the pumpkin. Give it a simple, haunting expression or a friendly wink.
– Carve the ghost so the figure is hollow and the skin around it stays intact. Keep the outline clean for a crisp glow.
– Add a subtle backdrop. Carve tiny stars or a thin crescent moon to set the scene.
Lighting matters
Use a white or pale light inside to make the silhouette pop against the dark rind. The high contrast is what makes the design easy to read from a distance.
Practical tips
Use a precise knife or small saw for sharp lines. Clear away scraps around the ghost so light can shine through cleanly. If the pumpkin feels a bit flimsy, trim from the inside to tighten the shape.
Optional mood booster
A little fog from dry ice placed behind the pumpkin can create a ghostly mist at your Halloween gathering. Always handle dry ice with gloves and follow safety guidelines.
Display ideas
Set the lantern on the porch with a few simple bats cut from black paper nearby. Pair with warm porch lights to keep the scene welcoming, not scary.
This silhouette idea is simple to pull off and makes a bold statement in your Halloween decor.
Unleash your creativity this Halloween! A Jack-o-lantern with a ghostly silhouette can turn your pumpkin into a charming yet spooky masterpiece that lights up the night.
Product Recommendations –
You Might Also Like
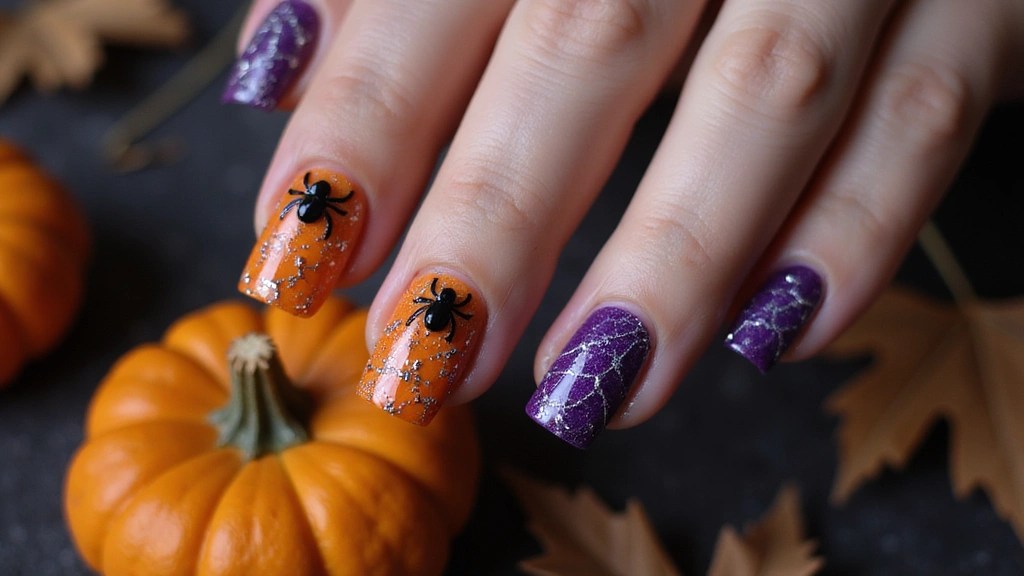
16 Creepy and Trendy Halloween Nail Art Ideas You Need to Try This Year!

Witch’s Brew & Beyond: 15 Hauntingly Delicious Halloween Drinks
9. The Floral Fantasy
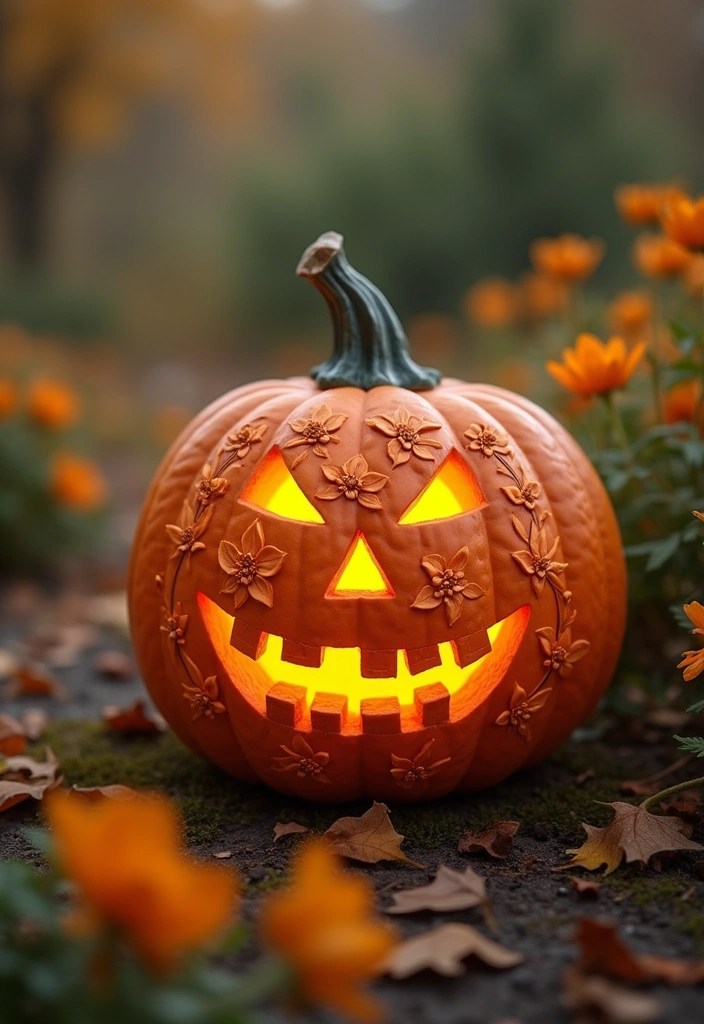
You want Halloween decor that feels fresh and elegant. A floral Jack-o-lantern fits that goal.
This approach softens the holiday and adds a modern art vibe to your home.
Carve flowers into the pumpkin so light can glow through the petals. Try roses, daisies, or simple blossom shapes. Build the design in layers to add depth and shadow.
This idea appeals to design lovers who want a subtle look. It works indoors.
Tips for success:
– Pick flower shapes that cast interesting shadows and let you layer petals.
– Start with light cuts for outer petals, then deepen some lines for texture.
– Add color with paint after carving to highlight petals while the glow stays soft.
To get started, sketch the pattern on the pumpkin first. Then carve the outlines, then the inner petal shapes. Use thin layers for petals and wipe away dust as you go.
After carving, brush on light paint to mimic flower tones. Finish with a warm LED light inside. Choose ivory, blush pink, pale yellow, and sage green for a gentle glow. Place it where the light shines, and enjoy a chic centerpiece.
If fresh petals worry you, try faux flowers or pressed shapes. These keep their look longer and glow softly when lit. Your guests will notice the detail.
Product Recommendations –
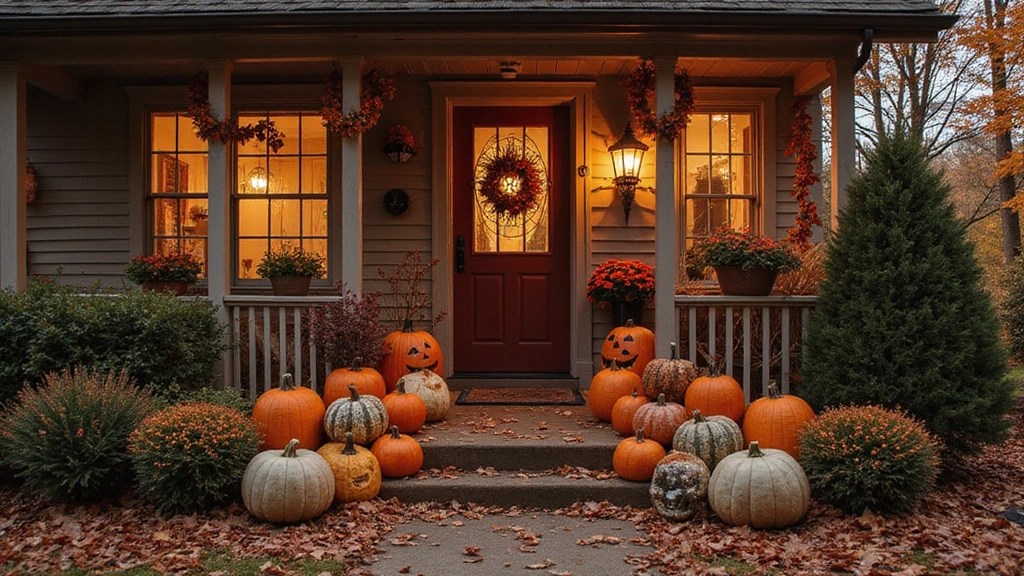
10. The Pumpkin Stack
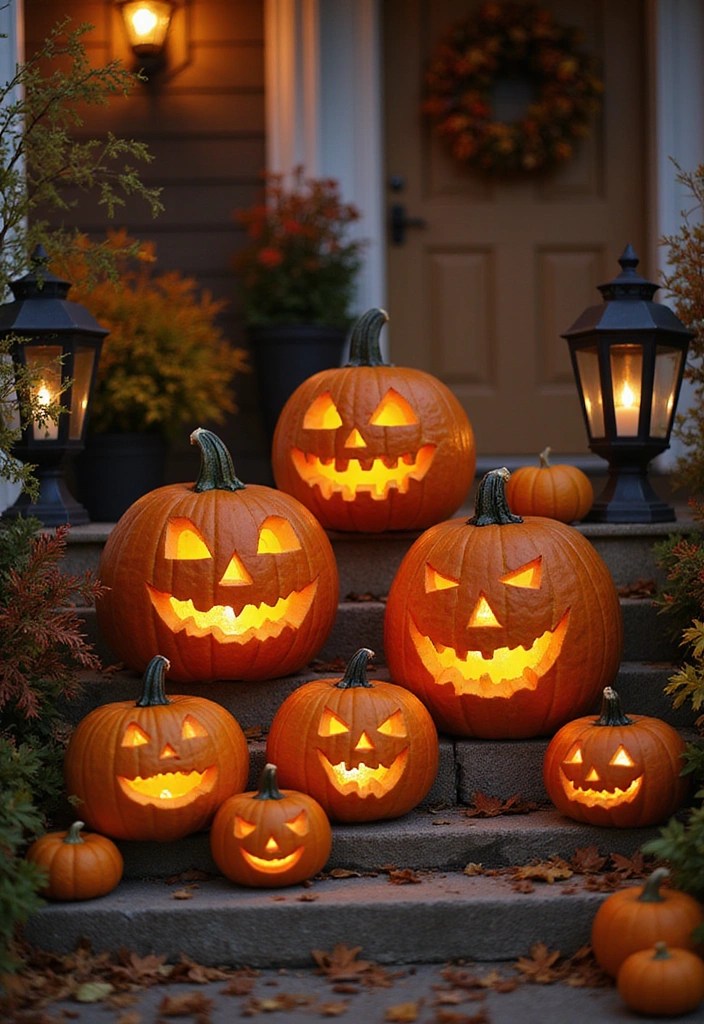
You want a Halloween display that grabs attention and lasts through the night. A pumpkin stack adds height, drama, and a touch of craft magic. Here’s how to build one that looks fresh and stays steady, from planning to finishing touches.
1. Plan the layout — Choose whether your stack will rise as a tall centerpiece or line up along the porch to guide guests.
2. Choose your pumpkins — Mix small, medium, and large pumpkins for the visual rhythm and strength of a pumpkin stack.
3. Design each pumpkin — Give every pumpkin its own style, from classic jack-o-lantern faces to spooky silhouettes.
4. Secure the stack — Thread a sturdy dowel rod through the pumpkins to keep them in place.
5. Build the stack — Place the largest pumpkin at the bottom, then add smaller ones up the rod for stability.
6. Light it safely — Use LED lights inside and avoid real candles for a safe, long-lasting glow.
7. Set the scene — Position the stack on a stable surface and illuminate it with soft outdoor lighting.
With patience, you’ll create a striking jack-o-lantern display that sparks smiles and memories.
Product Recommendations –
4-Pack Halloween LED Pumpkin Lights Battery Operated – Orange Pumpkin Li…
Conclusion
This Halloween, make your Jack-o-lanterns a true reflection of your personality and creativity! From whimsical silhouettes to classic haunted houses, the sky’s the limit with your imagination.
Don’t be afraid to experiment and combine ideas to create something truly unique. Whether you’re crafting solo or with family, these DIY projects guarantee a memorable Halloween experience that you’ll cherish for years to come.
Note: We aim to provide accurate product links, but some may occasionally expire or become unavailable. If this happens, please search directly on Amazon for the product or a suitable alternative.
This post contains Amazon affiliate links, meaning I may earn a small commission if you purchase through my links, at no extra cost to you.
Frequently Asked Questions
What materials do I need to create my Jack-o-lantern spectacles?
Creating your Jack-o-lantern spectacles is easy and fun! You’ll need a pumpkin, carving tools, a marker for sketching your design, and possibly some paint for added flair. Don’t forget a candle or LED light to enhance your spooky ambiance!
Gathering these materials will set you up for an exciting DIY project that transforms your fall decor.
Are there any tips for carving intricate designs on Jack-o-lanterns?
Absolutely! When carving intricate designs, start by sketching your ideas on the pumpkin with a marker. Use small, sharp carving tools for detailed areas, and remember to take your time.
Also, consider using a stencil for more complex patterns. Practice on a piece of cardboard first if you’re unsure! This will help you achieve those stunning, eye-catching designs that will wow your guests this Halloween.
How can I make my Jack-o-lantern last longer?
To keep your Jack-o-lantern looking fresh throughout the Halloween season, try a couple of tricks! After carving, apply petroleum jelly to the cut edges to lock in moisture.
Additionally, placing your pumpkin in a cool, shaded area can slow down the decay process. If possible, bring it indoors during the night to prevent it from rotting too quickly!
What are some kid-friendly Jack-o-lantern ideas?
For a family-friendly approach, consider designs that are more whimsical than spooky! Ideas like the Whimsical Monster or the Floral Fantasy can engage children with their fun, cheerful vibes.
These designs are generally easier to carve and can be a delightful way to include kids in the crafting process. Plus, they’ll love showing off their creations to friends and family!
Can I use artificial pumpkins for my Jack-o-lantern crafts?
Absolutely! Using artificial pumpkins is a great option, especially if you want your creations to last beyond Halloween.
These pumpkins can be painted or carved just like real ones, and they won’t rot. Plus, you can reuse them every year, making them a fantastic addition to your fall decor collection!
Related Topics
Jack-o-lantern
Halloween crafts
fall decor
DIY projects
spooky designs
whimsical pumpkins
easy carving
pumpkin decorations
creative Halloween
family friendly
seasonal crafts
Halloween decor

Leave a comment