
Imagine a sunny afternoon, the birds are chirping, and the park is buzzing with laughter. You’ve decided to have a spontaneous picnic, but wait—what about snacks? No need to panic! We’ve gathered a delightful list of 18 last-minute quick picnic snacks that you can whip up in just 10 minutes or less. From fresh and zesty flavors to comforting bites, these easy snacks will elevate your picnic game without stressing you out. Grab your blanket and let’s get snacking!
Contents
- 1. Fruit Skewers
- 2. Mini Caprese Bites
- 3. Savory Hummus & Veggie Cups
- 4. Cheese and Crackers Platter
- 5. Peanut Butter Banana Wraps
- 6. Chocolate-Dipped Strawberries
- 7. Trail Mix Cups
- 8. Easy Guacamole and Chips
- 9. Yogurt Parfaits
- 10. Spicy Popcorn
- 11. Energy Bites
- 12. Pita Pocket Sandwiches
- 13. Sweet Potato Chips
- 14. Cheese Quesadillas
- 15. Avocado Toast Bites
- 16. Homemade Salsa with Tortilla Chips
- 17. Cucumber Sandwiches
- 18. Easy Berry Smoothies
1. Fruit Skewers

Fruit skewers are the ultimate refreshing snack for any picnic. They’re not only visually appealing but also incredibly easy to assemble. Just grab some of your favorite fruits—think strawberries, blueberries, melon, and pineapple. Cut them into bite-sized pieces and thread them onto skewers. For an added twist, drizzle a touch of honey or a sprinkle of lime juice before serving.
To make your fruit skewers even easier to prepare, consider using wooden skewers. These durable 12″ natural bamboo skewers are perfect for holding your colorful fruits together, and with 100 pieces, you’ll have enough for multiple picnic adventures.
If you choose to add a drizzle of honey for extra sweetness, using a honey dispenser can make serving a breeze. This no-drip glass dispenser not only looks great but ensures you can easily control the amount of honey you add, preventing any sticky mess.
Lastly, if you’re considering serving a yogurt dip alongside your fruit skewers, a set of yogurt dip containers can be incredibly handy. These leakproof containers are perfect for packing your favorite dip, making it easy to transport without any spills.
Use seasonal fruits for the best flavor and variety. With these helpful tools, your picnic snack preparation will be quick and enjoyable!
Recipe Overview
– Servings: 4
– Prep Time: 10 minutes
– Total Time: 10 minutes
– Calories: Approximately 100 per serving
Nutrition Information
– Carbohydrates: 25g
– Protein: 1g
– Fats: 0.5g
– Fiber: 3g
Ingredients
– 1 cup strawberries, halved
– 1 cup pineapple, cubed
– 1 cup melon, cubed
– 1 cup blueberries
– Wooden skewers
Instructions
1. Prepare your fruits by washing and cutting them into bite-sized pieces.
2. Thread the fruits onto the skewers, alternating the colors for a vibrant look.
3. If desired, drizzle honey or lime juice over the assembled skewers.
4. Serve in a mason jar vase for transport.
FAQs: Can I use frozen fruit? Fresh fruit is preferred for skewering, but thawed frozen fruit can work in a pinch if you’re careful.
Product Recommendations:
• leakproof yogurt dip containers
2. Mini Caprese Bites

Mini Caprese bites bring the traditional Italian salad into a fun, snackable form. Simply stack cherry tomatoes, fresh basil leaves, and fresh mozzarella balls on toothpicks for an explosion of flavor. Drizzle balsamic glaze over them for an irresistibly tangy finish that enhances the flavor profile.
These little bites are perfect for a quick picnic snack, offering a refreshing taste that’s easy to assemble. They’re not only delicious but also visually appealing, making them a great addition to any outdoor gathering or casual get-together. Plus, they can be made in just a matter of minutes!
Recipe Details
Servings: 4
Prep Time: 10 minutes
Total Time: 10 minutes
Calories: Approximately 150 per serving
Nutrition Information:
– Carbohydrates: 8g
– Protein: 8g
– Fats: 10g
– Fiber: 1g
Ingredients:
– 1 cup cherry tomatoes
– 1 cup mozzarella balls
– Fresh basil leaves
– Balsamic glaze
– Toothpicks or small skewers
Instructions:
1. On each toothpick, thread a cherry tomato, a basil leaf, and a mozzarella ball.
2. Repeat until all ingredients are used.
3. Drizzle with balsamic glaze before serving.
Use fresh mozzarella for the best results. Prepare them just before heading out to keep them fresh.
FAQs:
*Can I make these in advance?* Yes, but some moisture may accumulate; it’s best to prepare them an hour before serving.
Product Recommendations:
3. Savory Hummus & Veggie Cups

Savory hummus and veggie cups are a delightful way to enjoy fresh vegetables while keeping your snack time healthy. With just a few simple ingredients and minimal prep, these cups are perfect for last-minute picnic snacks. The combination of creamy hummus and crunchy veggies not only satisfies your cravings but also provides a nutritious boost.
You can customize your veggie cups with a variety of hummus flavors, making each bite exciting. Whether you opt for classic, roasted red pepper, or garlic hummus, these cups are sure to impress. Plus, they’re easy to pack and take on the go!
Ingredients
– 1 cup hummus (store-bought or homemade)
– 1 cup carrot sticks
– 1 cup cucumber sticks
– 1 cup bell pepper strips
– Small cups or containers
Instructions
1. Portion hummus into small cups.
2. Cut vegetables into sticks and strips.
3. Arrange the vegetable sticks alongside the hummus in the cups.
4. Pack into a cooler for freshness.
Feel free to mix different flavors of hummus for variety, and remember to keep those veggies cold to maintain their crunchiness. You can also experiment with other vegetables like zucchini and radishes to keep things interesting!
Product Recommendations:
4. Cheese and Crackers Platter

A classic cheese and crackers platter is always a hit at any picnic. Select a variety of cheeses such as cheddar, gouda, and brie, along with an assortment of crackers to keep things interesting. For added convenience, consider using an assorted crackers variety pack to make your selection process simple and quick. Add some grapes or dried fruits for a touch of sweetness. This snack is not only easy to create but also offers a delightful mix of flavors and textures.
To keep your cheese fresh throughout your picnic, pack it in an insulated cooler bag with an ice pack to maintain its temperature. When you’re ready to serve, arrange the cheeses and crackers on a cutting board or large plate. A cheese knife set can be a great addition, making it easy to cut and serve the cheese while enhancing your presentation.
Choose cheeses with different textures (hard and soft) for a better experience. Pair with a small bottle of honey for drizzling! Pack everything up with ease, and enjoy a delightful snack that brings a variety of flavors to your picnic.
Ingredients:
– 1 block of cheddar cheese
– 1 block of gouda cheese
– 1 round of brie cheese
– Assorted crackers (choose a variety pack for convenience)
– Handful of grapes or dried fruits (like apricots or figs)
– Optional: Small bottle of honey for drizzling
Instructions:
1. Start by selecting your cheeses. Cut the cheddar and gouda into bite-sized cubes and leave the brie whole or slice it into wedges.
2. Arrange the cheeses on a cutting board or large plate, spacing them out for an appealing presentation.
3. Open your assorted crackers variety pack and arrange the crackers around the cheese. Mix different shapes and sizes for visual interest.
4. Add a handful of grapes or a mix of dried fruits to the platter for a sweet contrast to the savory cheese.
5. If desired, place a small dish of honey on the side for drizzling over the cheeses.
6. Carefully pack your platter into an insulated cooler bag, placing an ice pack underneath the cheeses to keep them fresh until serving.
7. Enjoy your easy, last-minute cheese and crackers platter at your picnic!
Product Recommendations:
• assorted crackers variety pack
5. Peanut Butter Banana Wraps

Peanut butter banana wraps are not only delightful but also incredibly satisfying, making them a perfect choice for quick picnic snacks. With just a few simple ingredients, you can whip up this easy treat in no time. The combination of creamy peanut butter and sweet banana wrapped in a whole grain tortilla offers a balanced snack that is both filling and nutritious.
These wraps can be customized with added crunch from granola or a dash of cinnamon, elevating the flavor profile. Whether you’re heading to the park or need a quick bite at home, these wraps are a go-to option.
Ingredients:
– 2 whole grain tortillas
– 2 ripe bananas
– 2 tablespoons natural peanut butter
– Optional: granola or cinnamon
Instructions:
1. Start by spreading peanut butter evenly over each tortilla, covering the entire surface for maximum flavor.
2. Place a banana at one edge of the tortilla. If you’re using granola or cinnamon, sprinkle it over the peanut butter before adding the banana.
3. Roll the tortilla tightly, starting from the edge with the banana, to ensure the filling stays inside.
4. Once rolled, slice the tortilla into bite-sized rounds for easy snacking.
Choose whole grain tortillas for added fiber and consider almond butter if you want a different flavor twist. Enjoy your quick picnic snack!
Product Recommendations:
• granola
6. Chocolate-Dipped Strawberries

Who can resist chocolate-dipped strawberries? They are not only easy to make but also add a touch of elegance to your picnic. Melt some chocolate (dark or milk) in a microwave-safe bowl for a simple and convenient process. Dip fresh strawberries into the melted chocolate, and let them cool until the chocolate hardens. It’s a sweet treat that will impress everyone!
Recipe Overview
– Servings: 4
– Prep Time: 10 minutes
– Total Time: 10 minutes
– Calories: Approximately 150 per serving
Nutrition Information
– Carbohydrates: 20g
– Protein: 2g
– Fats: 8g
– Fiber: 2g
Ingredients
– 1 cup fresh strawberries
– 1 cup chocolate chips (dark or milk)
Instructions
1. Melt the chocolate chips in a microwave-safe bowl in 30-second intervals, stirring in between until smooth.
2. Dip each strawberry into the melted chocolate, making sure to cover half the berry.
3. Place them on a parchment paper-lined tray and let them cool until the chocolate hardens.
For a fun twist, sprinkle some sea salt or crushed nuts on top of the chocolate before it hardens.
To make your chocolate-dipped strawberries even more delightful, consider using chocolate chips that are sugar-free and keto-friendly, so everyone can enjoy this indulgent treat guilt-free.
FAQs: How can I store leftovers? Keep them in the refrigerator for a day or two, but they are best enjoyed fresh.
Product Recommendations:
7. Trail Mix Cups

Trail mix cups are a fantastic option for quick picnic snacks that provide a great energy boost. With a simple combination of nuts, dried fruits, seeds, and a touch of dark chocolate, you can create a nutritious treat that satisfies cravings and keeps you fueled for your outdoor adventures. These easy-to-make snacks are perfect for portioning into small cups or bags, making them ideal for grab-and-go convenience.
To make preparation even simpler, consider using reusable snack bags. These leakproof and dishwasher-safe bags help keep your trail mix fresh and organized. You might also want to grab a mixing bowls set for combining your ingredients effortlessly. And for those who like to make trail mix in bulk, airtight food storage containers are a must-have to preserve freshness for weeks.
Recipe Overview
– Servings: 4
– Prep Time: 10 minutes
– Total Time: 10 minutes
– Calories: Approximately 190 per serving
Nutrition Information
– Carbohydrates: 15g
– Protein: 6g
– Fats: 12g
– Fiber: 3g
Ingredients
– 1 cup mixed nuts (almonds, walnuts, cashews)
– 1 cup dried fruit (raisins, cranberries, apricots)
– 1/2 cup dark chocolate chips
– 1/2 cup pumpkin or sunflower seeds
Instructions
1. In a large bowl, combine the mixed nuts, dried fruit, dark chocolate chips, and seeds until everything is well mixed.
2. Portion the mixture into individual cups or reusable snack bags for easy packing and convenience.
3. If desired, customize your trail mix by adding ingredients like coconut flakes or pretzels for extra flavor and texture.
Enjoy these last-minute, easy trail mix cups during your picnic or on any outdoor adventure!
Product Recommendations:
• airtight food storage containers
8. Easy Guacamole and Chips
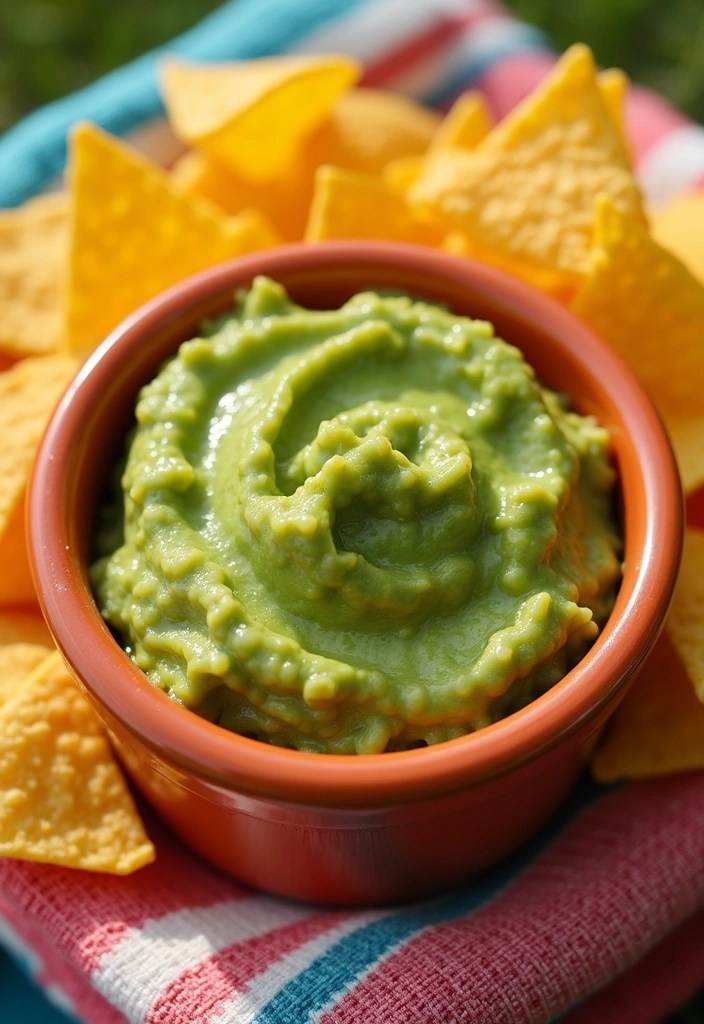
Guacamole is always a crowd-pleaser, and the best part is, it’s super easy to make. Just mash ripe avocados with lime juice, salt, and diced tomatoes for a fresh taste. Serve your guacamole alongside crispy tortilla chips for dipping, and you have a flavorful snack ready in no time.
This quick recipe is perfect for last-minute picnics and gatherings, allowing you to whip up a delicious treat in just 10 minutes.
Recipe Overview
– Servings: 4
– Prep Time: 10 minutes
– Total Time: 10 minutes
– Calories: Approximately 250 per serving
Nutrition Information
– Carbohydrates: 30g
– Protein: 3g
– Fats: 15g
– Fiber: 5g
Ingredients
– 2 ripe avocados
– 1 lime (juiced)
– 1 medium tomato (diced)
– Salt to taste
– Tortilla chips (for serving)
Instructions
1. In a bowl, mash the avocados with a fork until smooth.
2. Stir in the lime juice, diced tomato, and salt until well combined.
3. Taste and adjust the seasoning, adding more salt or lime juice if desired.
4. Serve immediately with tortilla chips for dipping.
For an extra kick, consider adding minced garlic or jalapenos to your guacamole. Enjoy this easy and delicious snack that’s perfect for any gathering!
Product Recommendations:
9. Yogurt Parfaits

Yogurt parfaits are cute, healthy, and incredibly versatile. Layer yogurt with granola and your favorite fruits in small cups for a delicious treat. Not only are they rich in protein and fiber, but they also look stunning, making them perfect picnic snacks when you’re aiming to impress.
For your yogurt parfaits, consider using clear plastic cups, which beautifully showcase the layers of yogurt, granola, and berries. These cups are disposable, making cleanup a breeze.
To build the parfaits, start with your yogurt of choice—Greek or regular work well. You can easily enhance the flavor and texture with a granola variety pack that not only adds crunch but is also a good source of fiber and protein. Finish it off with a layer of fruit using a mixed berries blend, which can be fresh or frozen depending on what you have available. These berries not only provide vibrant color but also pack in essential vitamins.
Recipe Details
Servings: 4
Prep Time: 10 minutes
Total Time: 10 minutes
Calories: Approximately 180 per serving
Nutrition Information:
– Carbohydrates: 22g
– Protein: 10g
– Fats: 7g
– Fiber: 3g
Ingredients
– 2 cups yogurt (Greek or regular)
– 1 cup granola
– 1 cup mixed berries (strawberries, blueberries, raspberries)
Instructions
1. In a cup, layer yogurt, a sprinkle of granola, and berries.
2. Repeat the layers until cups are filled.
3. Serve right away or chill until you’re ready to enjoy.
Feel free to swap fruits according to what’s in season or your personal preference. Yogurt parfaits are best enjoyed fresh, but you can prepare them a few hours ahead of time and keep them chilled until it’s time to enjoy your picnic.
Product Recommendations:
10. Spicy Popcorn

Popcorn is such a fun snack, and when you kick it up a notch with some spice, it becomes a picnic favorite! You can pop corn on the stove or in the microwave using a reliable tool like the Popcorn Machine, which makes popping a breeze and even includes a large lid for serving.
Once your popcorn is ready, drizzle it with melted butter and sprinkle with your choice of spicy seasoning—think chili powder, cayenne, or even a dash of sriracha. For those looking to enhance their flavor game, the offers a delightful variety of organic spices that can elevate your popcorn experience. This quick snack is light, crunchy, and addictive!
After preparing your spicy popcorn, consider storing any leftovers in an [airtight food storage container to keep them crisp and fresh for your next snack. For a savory twist, try adding grated cheese along with the spices. Enjoy your picnic with this easy-to-make, flavorful snack that’s sure to impress!
Ingredients:
– 1/2 cup popcorn kernels
– 2-3 tablespoons vegetable oil (for stovetop popping)
– 2-3 tablespoons melted butter
– 1 teaspoon chili powder (or to taste)
– 1/2 teaspoon cayenne pepper (optional, for extra heat)
– Salt to taste
– Grated cheese (optional)
Instructions:
1. If using the stovetop, heat the vegetable oil in a large pot over medium heat. Add a few popcorn kernels and cover the pot.
2. Once the kernels pop, add the rest of the popcorn kernels to the pot and cover it again. Shake the pot occasionally to ensure even popping.
3. When the popping slows down (about 2 seconds between pops), remove the pot from the heat.
4. Transfer the popped popcorn to a large bowl.
5. Drizzle the melted butter over the popcorn and toss to coat evenly.
6. Sprinkle the chili powder, cayenne pepper, and salt over the popcorn, adjusting the amounts to your taste preferences.
7. If desired, add grated cheese and mix well for a savory flavor.
8. Serve immediately or store in an airtight container for later enjoyment!
FAQs: Can I use pre-packaged popcorn? Yes, but make sure to add your own seasonings to elevate the flavor.
Product Recommendations:
• West Bend Stir Crazy Popcorn Machine
• FreshJax Hot & Spicy Seasoning Gift Set
• airtight food storage container
11. Energy Bites

Energy bites are perfect for a quick boost, and they’re so easy to make! Combine rolled oats, nut butter, honey, and your favorite add-ins like chocolate chips or dried fruit in a bowl. These little snacks are not only delicious but also packed with nutrients, making them ideal for a picnic or any on-the-go situation.
To get started, here’s what you’ll need:
Ingredients:
– 1 cup rolled oats
– ½ cup nut butter (peanut or almond)
– ¼ cup honey
– ½ cup chocolate chips or dried fruit (optional)
– ¼ cup ground flaxseed or chia seeds (optional for added nutrition)
– A pinch of salt
Instructions:
1. In a mixing bowl, combine the rolled oats, nut butter, and honey.
2. If you’re adding chocolate chips or dried fruit, toss them in along with the ground flaxseed or chia seeds.
3. Mix everything together until well combined.
4. Once the mixture is ready, take small portions and roll them into bite-sized balls.
5. Place the energy bites on a baking sheet lined with parchment paper.
6. For optimal texture, refrigerate the energy bites for at least 30 minutes.
7. Store any leftovers in an airtight food storage container in the fridge for up to a week.
For those with nut allergies, simply swap out peanut butter for sunflower seed butter. These energy bites are a convenient and healthy snack option that can be whipped up in no time, making them a fantastic addition to your picnic spread! Enjoy your delicious and nutritious energy bites!
Product Recommendations:
12. Pita Pocket Sandwiches
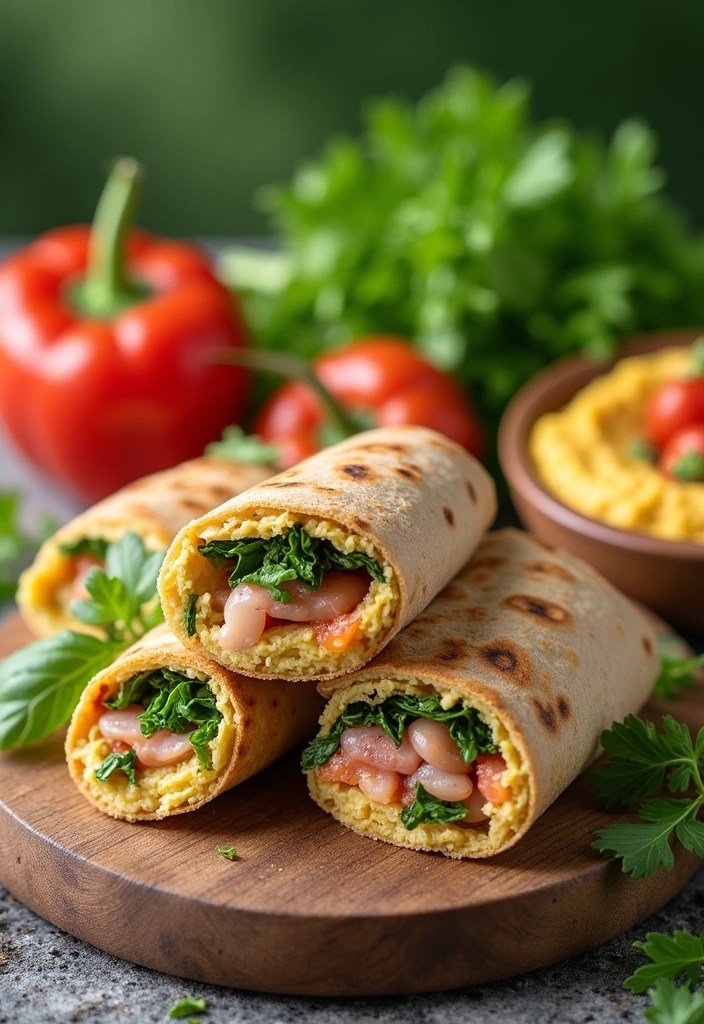
Pita pocket sandwiches are super versatile and can be filled with all your favorite ingredients. Use whole wheat pita pockets for a nutritious base, and stuff them with hummus, sliced turkey, spinach, and tomatoes. They’re easy to hold, and you can mix and match fillings to suit everyone’s taste preferences. Plus, they’re a great way to enjoy a balanced meal on the go!
To keep your pita pockets fresh and avoid any sogginess, consider packing your fillings separately until you’re ready to eat. An insulated lunch bag can help keep everything neat and cool, making it perfect for outdoor adventures. Don’t forget to try different proteins or veggies to keep things interesting!
Recipe Overview
– Servings: 4
– Prep Time: 10 minutes
– Total Time: 10 minutes
– Calories: Approximately 220 per serving
Nutrition Information
– Carbohydrates: 30g
– Protein: 14g
– Fats: 6g
– Fiber: 4g
Ingredients
– 4 whole wheat pita pockets
– 1 cup hummus
– 1 cup sliced turkey or chicken
– 1 cup spinach leaves
– 1 cup sliced tomatoes
Instructions
1. Cut pita pockets in half to create pockets.
2. Spread hummus inside each pocket.
3. Fill with turkey, spinach, and tomatoes.
For a delightful twist, you can try different hummus flavors to add some extra flavor to your sandwiches. Enjoy your picnic with these easy-to-make and satisfying pita pocket sandwiches!
Product Recommendations:
13. Sweet Potato Chips

Sweet potato chips are a healthier alternative to regular chips and are surprisingly easy to whip up. Just slice sweet potatoes thinly using a mandoline slicer, toss them with olive oil, salt, and any spices you love, and bake until crispy. The mandoline helps achieve uniform slices, ensuring even cooking and a delightful crunch to accompany any picnic spread.
These chips are not only delicious but also packed with nutrients, making them a perfect addition to your lineup of quick picnic snacks. With just a few ingredients and minimal prep time, you can create a tasty treat that everyone will enjoy.
Ingredients:
– 2 large sweet potatoes
– 2 tablespoons olive oil
– Salt and spices (cayenne, paprika) to taste
Instructions:
1. Preheat your oven to 400°F (200°C).
2. Slice the sweet potatoes thinly and place them in a bowl.
3. Drizzle with olive oil from an olive oil spray bottle for even distribution and sprinkle with salt and spices.
4. Spread them on a baking sheet in a single layer. A good choice is a baking sheet set, which provides various sizes perfect for this recipe.
5. Bake for about 20 minutes, flipping halfway through to ensure even crisping.
6. Keep an eye on them, as they can burn quickly. For extra flavor, try sprinkling garlic powder or rosemary.
These sweet potato chips are best eaten fresh, but if you have leftovers, store them in an airtight container for a day or two. Enjoy your quick and easy picnic snack!
Product Recommendations:
14. Cheese Quesadillas

Cheese quesadillas are a quick and cheesy delight! Simply cook tortillas on a skillet filled with shredded cheese until golden and melted. A non-stick skillet is perfect for this, ensuring that your quesadillas cook evenly without sticking. Once they’re ready, cut them into wedges and serve with salsa or guacamole for a fun, flavorful snack that everyone will love. You can even customize them with added veggies or proteins for extra flavor!
Recipe Details
Ingredients:
– 4 tortillas
– 2 cups shredded cheese (cheddar, mozzarella)
– Optional: diced peppers, onions, or cooked chicken
Instructions:
1. Heat your non-stick skillet over medium heat.
2. Place a tortilla in the pan and sprinkle with cheese and any optional ingredients.
3. Top with another tortilla and cook until golden brown, then flip and cook the other side.
4. Cut into wedges and serve with salsa.
For the best experience, serve them hot! A shredded cheese variety pack can help you whip these up in no time, making it easy to mix and match flavors. Consider adding spices like cumin or chili powder to kick it up. If you’re planning to take these on a picnic, a tortilla warmer can keep them nice and warm until you’re ready to enjoy!
FAQs: Can I make these in advance? They’re best fresh, but you can warm them up afterward.
Product Recommendations:
• shredded cheese variety pack
15. Avocado Toast Bites
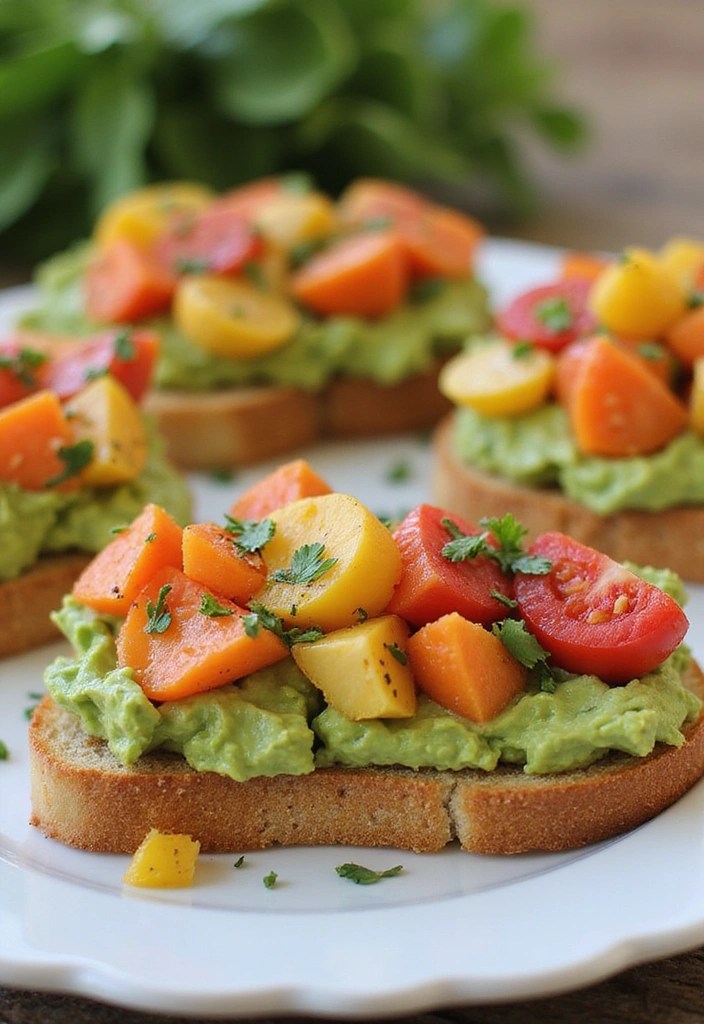
Avocado toast has taken the world by storm, and turning it into bite-sized snacks is a brilliant idea. Spread smashed avocado on small rounds of crusty bread, and top with cherry tomatoes or radish slices. For the perfect slice of bread, consider using a baguette slicing board, which makes it easy to achieve uniform pieces for your toast bites. Sprinkle some seasoning or herbs from an herb seasoning set for an elegant touch. These bites are deliciously trendy and perfect for sharing on a sunny picnic day.
Recipe Overview
– Servings: 4
– Prep Time: 10 minutes
– Total Time: 10 minutes
– Calories: Approximately 160 per serving
Nutrition Information
– Carbohydrates: 20g
– Protein: 4g
– Fats: 8g
– Fiber: 4g
Ingredients
– 1 ripe avocado
– 4 small rounds of bread (baguette or sourdough)
– Salt, pepper, and chili flakes to taste
– Optional toppings: cherry tomatoes, radishes, microgreens
Instructions
1. Toast the rounds of bread until golden.
2. Mash the avocado and spread it evenly on each piece of toast.
3. Top with sliced cherry tomatoes or radishes, and season to taste.
4. Use a variety of toppings for an appealing platter. A squeeze of lemon adds freshness!
FAQs: Can I prepare these ahead? The avocado will brown, so it’s best to assemble just before serving. To make the avocado mashing process simpler, consider using an avocado slicer for perfectly smooth results.
Product Recommendations:
16. Homemade Salsa with Tortilla Chips
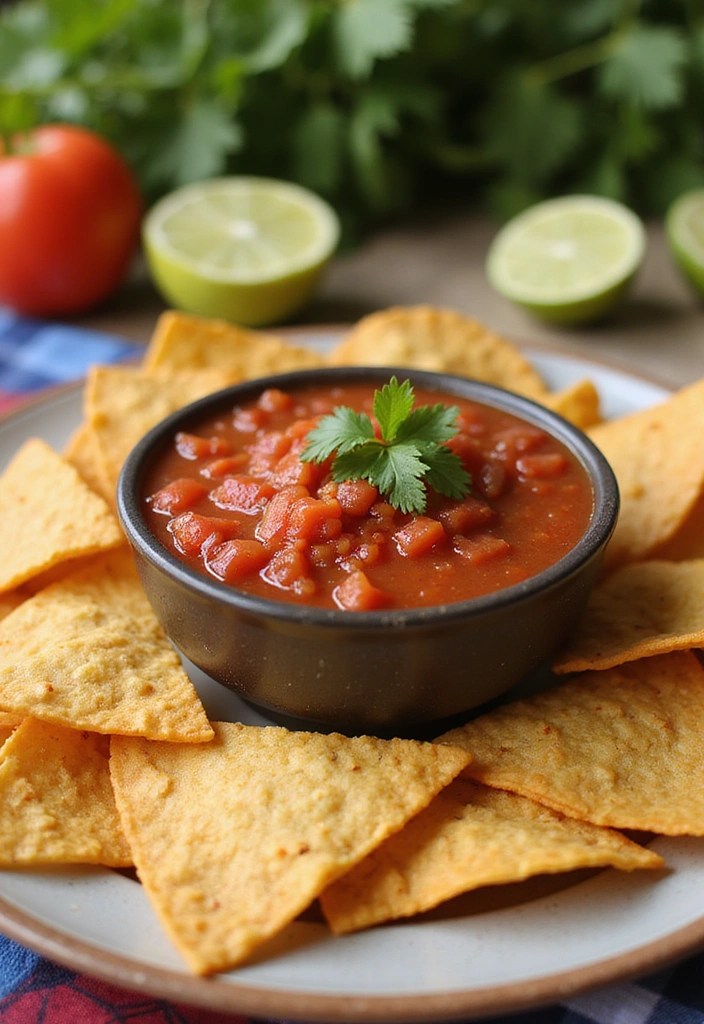
Homemade salsa is incredibly easy and refreshing. Just combine diced tomatoes, onions, cilantro, lime juice, and salt for that perfect zesty flavor. This vibrant salsa is the ideal companion for crispy tortilla chips, such as 365 by Whole Foods Market, Organic Restaurant Style White Corn Tortilla Chips. The light and fresh taste beautifully balances out richer snacks, making it a perfect choice for any picnic.
Preparation is a breeze when you use a Fullstar Vegetable Chopper and Spiralizer, which allows you to chop your tomatoes and onions quickly. For mixing, a Smart Essentials 3-Pack Prepware Mixing Bowl Set offers the perfect sizes for easy blending and serving.
Recipe Overview
– Servings: 4
– Prep Time: 10 minutes
– Total Time: 10 minutes
– Calories: Approximately 120 per serving
Nutrition Information
– Carbohydrates: 20g
– Protein: 3g
– Fats: 5g
– Fiber: 3g
Ingredients
– 2 cups diced tomatoes
– 1/2 cup diced onion
– 1/4 cup chopped cilantro
– Juice of 1 lime
– Salt to taste
– Tortilla chips for serving
Instructions
1. In a bowl, mix diced tomatoes, onion, cilantro, lime juice, and salt until well blended.
2. Allow it to rest for a few minutes to let the flavors meld.
3. Serve with tortilla chips.
For an extra kick, include diced jalapenos. If you have any leftover salsa, store it in the fridge for a couple of days. Enjoy this easy and last-minute picnic snack!
Product Recommendations:
• Smart Essentials 3-Pack Prepware Mixing Bowl Set
• 365 by Whole Foods Market Organic Restaurant Style White Corn Tortilla Chips
17. Cucumber Sandwiches
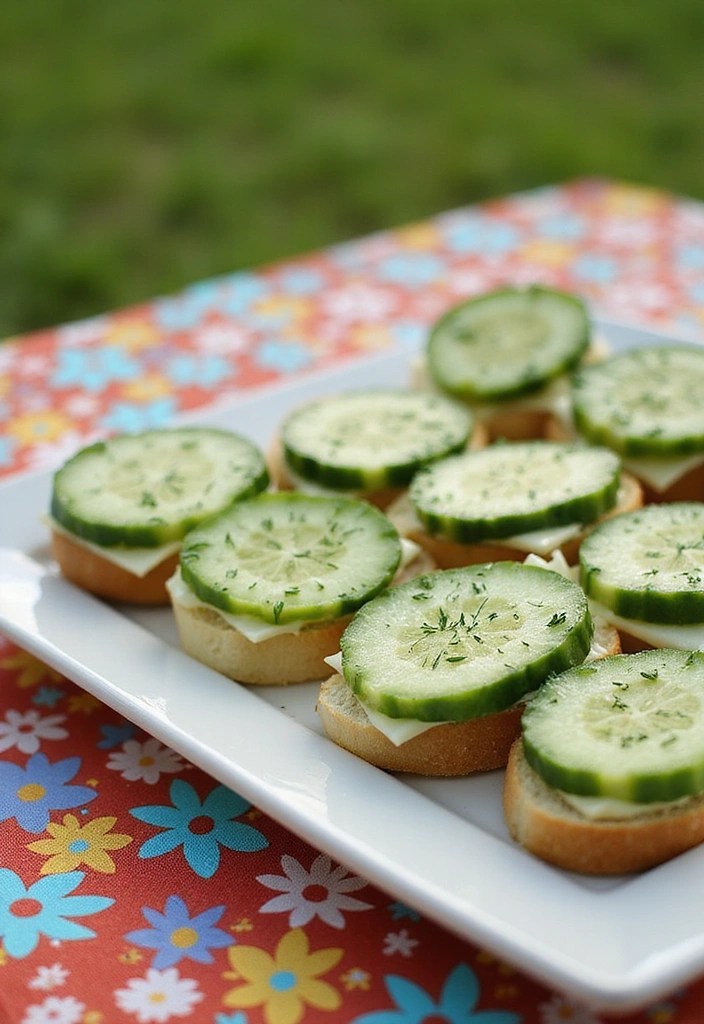
Cucumber sandwiches are a delightful addition to any picnic basket. They’re light, refreshing, and incredibly easy to throw together, making them a perfect choice for a last-minute snack. Kids and adults alike will enjoy the crispness of the cucumbers paired with the creamy texture of the cream cheese. For an extra burst of flavor, consider adding some dill or garlic powder to the cream cheese.
These sandwiches are not only delicious but also visually appealing, making them a hit at gatherings. Plus, they can be prepared in just about 10 minutes!
Ingredients
– 8 slices of whole grain or white bread
– 1 cup cream cheese (softened)
– 1 cucumber (thinly sliced)
– Salt and pepper to taste
Instructions
1. Spread cream cheese on one side of each slice of bread.
2. Layer cucumber slices on half of the bread, seasoning with salt and pepper to taste.
3. Top with the remaining slices to create sandwiches.
4. Cut the sandwiches into quarters for easy serving.
For a fun twist, use mini bread slices for bite-sized snacks. These sandwiches taste best when chilled, so consider preparing them in advance and storing them in the refrigerator until you’re ready to enjoy!
Product Recommendations:
• Portable Food Storage Containers
18. Easy Berry Smoothies

Berry smoothies are a refreshing way to cool off, and they take almost no time to prepare. Simply blend together your favorite berries, yogurt, and a splash of juice or milk for a delicious drink that’s perfect for sipping during your picnic. It’s a healthy, hydrating option that can be made in minutes!
For a smooth and creamy texture, a high-speed blender is ideal. With its powerful 1000-watt base and total crushing technology, it effortlessly handles frozen fruit, ensuring your smoothies are perfectly blended every time.
Recipe Overview
– Servings: 2
– Prep Time: 5 minutes
– Total Time: 5 minutes
– Calories: Approximately 150 per serving
Nutrition Information
– Carbohydrates: 25g
– Protein: 4g
– Fats: 2g
– Fiber: 3g
Ingredients
– 1 cup mixed berries (strawberries, blueberries, raspberries)
– 1 cup yogurt (plain or flavored)
– 1/2 cup juice or milk
Instructions
1. In a blender, combine the berries, yogurt, and juice or milk.
2. Blend until smooth and creamy.
3. Pour into cups and enjoy.
Adjust the thickness by adding more or less liquid, and for an extra boost, consider mixing in a scoop of protein powder . With 25g of protein per serving, it’s a great way to enhance your smoothie without adding extra carbs or fats.
FAQs: Can I use frozen berries? Yes! Just a little more liquid might be needed if blending with frozen fruit. To enjoy your smoothie on the go, use with lids and straws, like the Silipint 22-Ounce Tumblers. They’re unbreakable and perfect for outdoor picnics.
With these tips and products, you can enjoy a delicious berry smoothie in just minutes!
Product Recommendations:
• Ninja BL610 Professional Blender
• Isopure Zero Carb Whey Isolate Protein Powder
• reusable silicone cups with lids and straws
Conclusion

Quick picnic snacks can turn an ordinary outing into an extraordinary experience. With these 18 easy ideas, you can effortlessly add flavor and fun to your picnic basket without spending hours in the kitchen. Whether you opt for fresh fruit skewers or savory quesadillas, the key is to enjoy the moment with loved ones and great food. Make your next outdoor adventure memorable with these delightful bites!
Now it’s your turn to bring these snacks to life and share your favorites with friends and family. Happy snacking!
Note: We aim to provide accurate product links, but some may occasionally expire or become unavailable. If this happens, please search directly on Amazon for the product or a suitable alternative.
This post contains Amazon affiliate links, meaning I may earn a small commission if you purchase through my links, at no extra cost to you.

Leave a comment