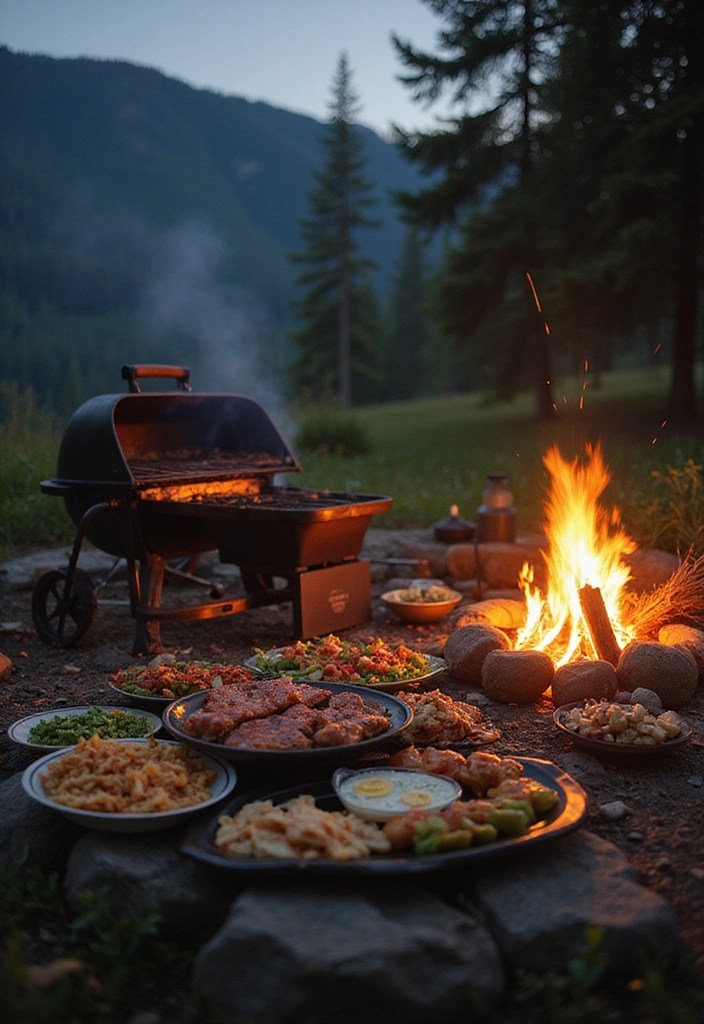
Nothing captures the spirit of the outdoors quite like the smoky aroma of grilled food drifting through the campsite. From crackling campfires to laughter-filled nights under the stars, grilled camping recipes turn every trip into a delicious adventure.
Whether you’re a seasoned camper or exploring your first outdoor getaway, these easy campfire grilling ideas will wow taste buds of all ages. With simple ingredients and minimal prep, you’ll cook flavorful meals that go way beyond basic hot dogs and instant noodles.
Get ready to elevate your camping cuisine with recipes that are hearty, smoky, and impossible to resist. So fire up your grill, gather your crew, and dive into these mouthwatering camping recipes that guarantee everyone will come back for seconds!
Contents
- 1. Grilled Marinated Chicken Skewers
- 2. Spicy Grilled Shrimp Tacos
- 3. Grilled Vegetable Foil Packets
- 4. Campfire Quesadillas
- 5. Grilled Corn on the Cob
- 6. Campfire Nachos
- 7. Grilled Sausages with Peppers
- 8. Grilled Pineapple Dessert
- 9. Grilled Stuffed Bell Peppers
- 10. Campfire Chili
- 11. Grilled Fish Tacos
- 12. Grilled Cheese and Bacon Sandwiches
- 13. Grilled Caprese Salad Skewers
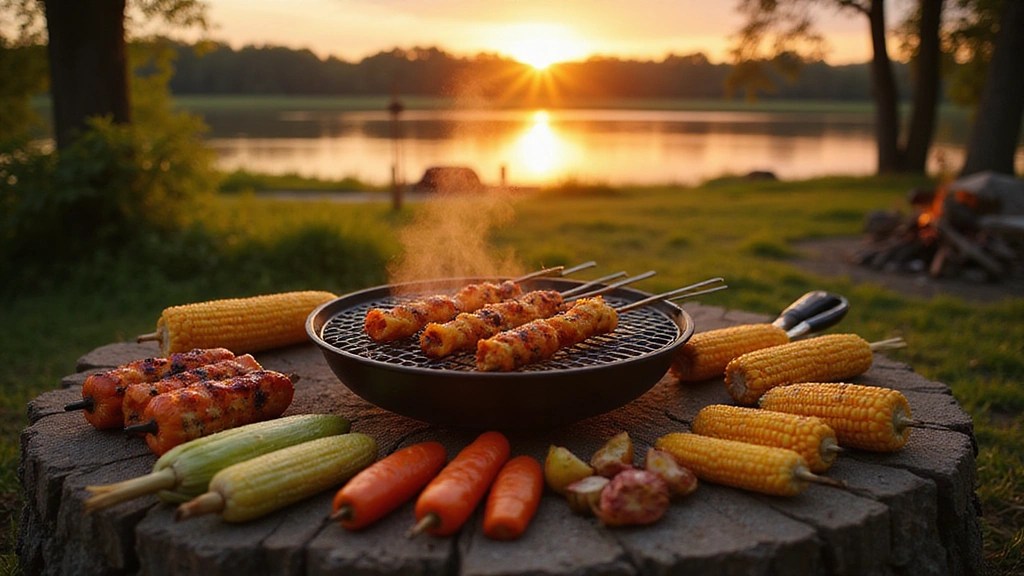
1. Grilled Marinated Chicken Skewers
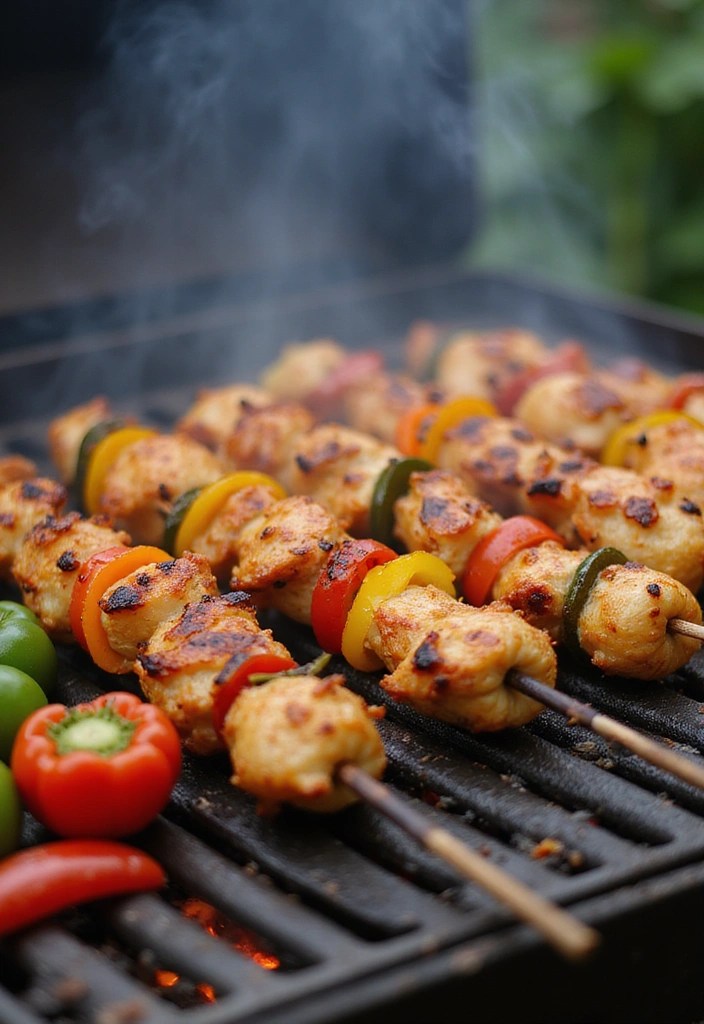
These grilled marinated chicken skewers are a campsite classic, and for good reason! They’re juicy, flavorful, and can be customized with your favorite veggies, making them perfect for picky eaters who might shy away from anything too adventurous. Marinating the chicken beforehand makes a huge difference in flavor. Try a zesty lemon-herb marinade or a sweet barbecue sauce for a fun twist. Pair with bell peppers, onions, or cherry tomatoes on the skewer to keep things colorful and exciting!
Ingredients:
– 1 pound chicken breast, cut into cubes
– 1/4 cup olive oil
– 2 tablespoons lemon juice
– 1 teaspoon garlic powder
– Salt and pepper to taste
– Assorted vegetables (bell peppers, zucchini, onions)
– Wooden skewers (soaked in water)
Instructions:
1. In a bowl, mix olive oil, lemon juice, garlic powder, salt, and pepper to create a marinade.
2. Add the chicken cubes to the marinade, cover, and refrigerate for at least 1 hour.
3. Thread marinated chicken and vegetables onto skewers.
4. Preheat your grill and cook skewers for about 15 minutes, turning until chicken is cooked through.
5. Serve hot and enjoy with your favorite dipping sauce.
Tips for Best Results:
– Soak wooden skewers for at least 30 minutes to prevent burning.
– Experiment with different marinades based on your family’s taste.
Frequently Asked Questions:
– Can I use frozen chicken? Yes, but thaw it completely prior to marinating.
– How long can I marinate chicken? Up to 24 hours for maximum flavor.
Product Recommendations:
2. Spicy Grilled Shrimp Tacos
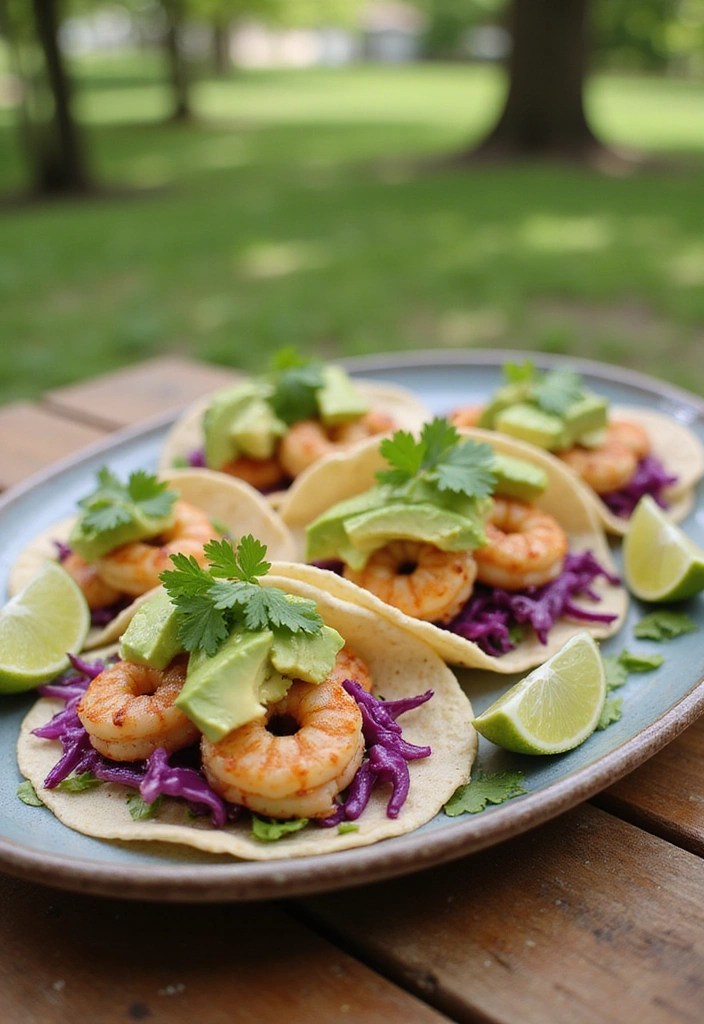
Spicy grilled shrimp tacos bring a taste of the beach to your camping adventure! These tacos are not only quick to prepare but also bursting with flavors that will make everyone’s mouth water. To make the process easier, consider using the Cuisinart XL collapsible marinating container for your shrimp marinade. Its large capacity and collapsible design make it perfect for marinating shrimp and easy to store when not in use.
The key to perfect shrimp tacos is a bold spice blend that can be adjusted to match your heat preference. Once your shrimp is marinated, grill them using a portable setup like the Gas One – 14-inch portable barbecue grill. This compact grill is great for camping and ensures your shrimp are cooked to perfection—just watch for that ideal pink and opaque finish!
Serve the grilled shrimp in warm tortillas, which can be easily heated on the grill. Consider using an Imusa 8in tortilla warmer to keep your tortillas warm and fresh. Kids can assemble their own tacos with fresh toppings like shredded cabbage and diced avocado, making this a fun and interactive meal.
Recipe Overview:
– Servings: 4
– Prep Time: 15 minutes
– Cook Time: 10 minutes
– Total Time: 25 minutes
– Calories: 300 per serving
Nutrition Information:
– Protein: 20g
– Carbohydrates: 30g
– Fat: 15g
– Fiber: 2g
Ingredients:
– 1 pound shrimp, peeled and deveined
– 2 tablespoons olive oil
– 1 tablespoon chili powder
– 1 teaspoon cumin
– Salt and pepper to taste
– Corn or flour tortillas
– Toppings: shredded cabbage, diced avocado, lime wedges
Step-by-Step Instructions:
1. In a bowl, combine olive oil, chili powder, cumin, salt, and pepper to create a marinade for the shrimp.
2. Toss the shrimp in the marinade and let sit for about 10 minutes.
3. Preheat the grill and add the marinated shrimp.
4. Grill for about 2-3 minutes per side until they turn pink and opaque.
5. Warm tortillas on the grill for a minute.
6. Assemble tacos with shrimp and desired toppings and enjoy!
For Best Results:
– Avoid overcooking shrimp, as they can become rubbery.
– Bring toppings in separate containers for easy assembly at the campsite.
Frequently Asked Questions:
– Can I use frozen shrimp? Yes, just ensure they are thawed before cooking.
– What if I don’t like spicy food? Use paprika instead of chili powder for a milder flavor.
With these products, you’ll be set for a delicious and hassle-free camping meal!
Product Recommendations:
• Cuisinart XL collapsible marinating container
• Gas One – 14-inch portable barbecue grill
3. Grilled Vegetable Foil Packets
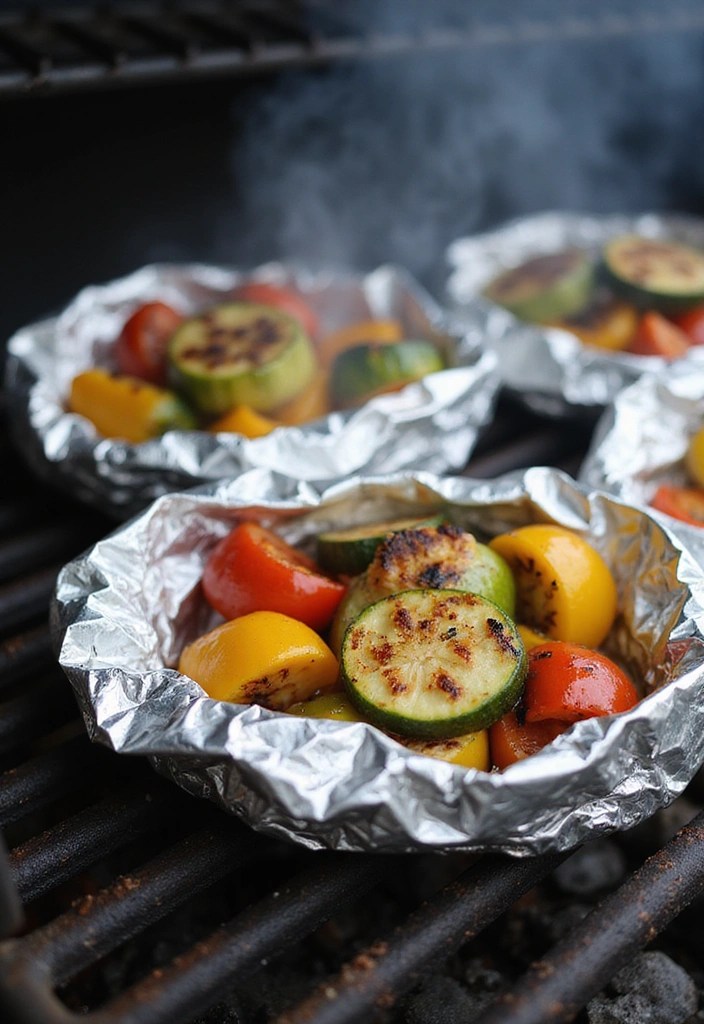
For those who want to keep it simple yet delicious, grilled vegetable foil packets are the way to go! This recipe is a colorful medley of your favorite veggies, all cooked in their own steam, enhancing their natural sweetness. Each packet can be customized, making it a perfect option for varying tastes.
Use bell peppers, zucchini, mushrooms, and even potatoes. Just toss them in olive oil—an olive oil spray bottle can make this step even easier—and sprinkle some seasoning, like Italian seasoning blend, and let the grill do the magic. The cleanup is a breeze, especially if you use heavy-duty aluminum foil to prevent tearing. It’s a great way to ensure everyone gets their veggies without any fuss!
Ingredients:
– 2 cups assorted vegetables (broccoli, zucchini, bell peppers, mushrooms)
– 2 tablespoons olive oil
– 1 teaspoon Italian seasoning
– Salt and pepper to taste
– Aluminum foil
Step-by-Step Instructions:
1. Cut veggies into bite-sized pieces and place them on a large sheet of aluminum foil.
2. Drizzle with olive oil, and sprinkle Italian seasoning, salt, and pepper.
3. Fold the foil into a packet, sealing the edges tightly.
4. Place the packet on the grill and cook for about 20 minutes, turning halfway through.
5. Carefully open packets (watch out for steam!) and serve.
For Best Results:
– For added flavor, include a splash of balsamic vinegar in the packet.
– Use heavy-duty foil to prevent tearing.
Frequently Asked Questions:
– Can I add protein to the packets? Yes, add pre-cooked sausage or chicken for a heartier meal.
– What if I don’t have Italian seasoning? Any herb mix you like will work great!
Product Recommendations:
4. Campfire Quesadillas
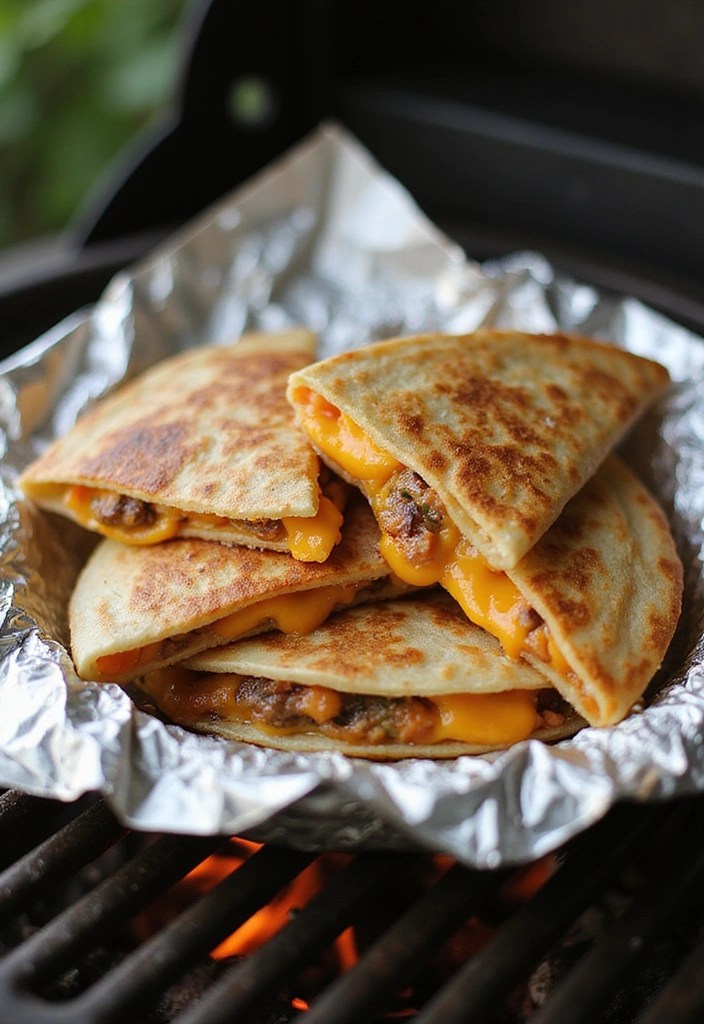
Who can say no to cheesy quesadillas? These campfire quesadillas are easy to prepare and can please even the pickiest eaters. All you need are tortillas, cheese, and your favorite fillings, like beans, chicken, or veggies.
To get started, wrap them in foil, and for the best results, consider using non-stick aluminum foil to prevent sticking and make cleanup a breeze. Place your wrapped quesadillas on the grill or over the fire for a melty, gooey treat. Pair with salsa or guacamole for a complete meal that’s sure to satisfy everyone around the campfire. Plus, they’re quick to make, meaning you can enjoy more time under the stars!
Recipe Overview:
– Servings: 2
– Prep Time: 5 minutes
– Cook Time: 10 minutes
– Total Time: 15 minutes
– Calories: 400 per serving
Nutrition Information:
– Protein: 18g
– Carbohydrates: 40g
– Fat: 22g
– Fiber: 4g
Ingredients:
– 2 tortillas
– 1 cup shredded cheese (cheddar or mozzarella)
– 1/2 cup cooked beans or chicken
– Salsa or guacamole for serving
– Aluminum foil
Step-by-Step Instructions:
1. Assemble your quesadillas by layering cheese and your chosen fillings between the tortillas.
2. Wrap each quesadilla tightly in aluminum foil to ensure even cooking and to keep all the deliciousness inside.
3. Place the wrapped quesadillas on the grill or directly over the campfire, cooking for about 5 minutes on each side.
4. Carefully unwrap the quesadillas and serve them warm with salsa or guacamole.
For Best Results:
– Use a non-stick spray on the foil to prevent sticking and to make sure your quesadillas come out perfectly.
– For an extra kick, consider adding jalapeños or your favorite spices to the filling.
If you find yourself without a grill, you can easily cook them in a skillet over the campfire. A versatile option is a cast iron skillet, which is durable and pre-seasoned, making it perfect for campfire cooking.
Frequently Asked Questions:
– Can I make them ahead of time? Yes, you can prep the quesadillas and store them in a cooler until you’re ready to cook.
– What if I don’t have a grill? You can cook them in a skillet over the campfire, which works just as well.
For those who prefer a portable option, consider a portable camping grill, which is compact and easy to transport, perfect for your camping adventures. Enjoy your quesadillas and make lasting memories under the stars!
Product Recommendations:
5. Grilled Corn on the Cob
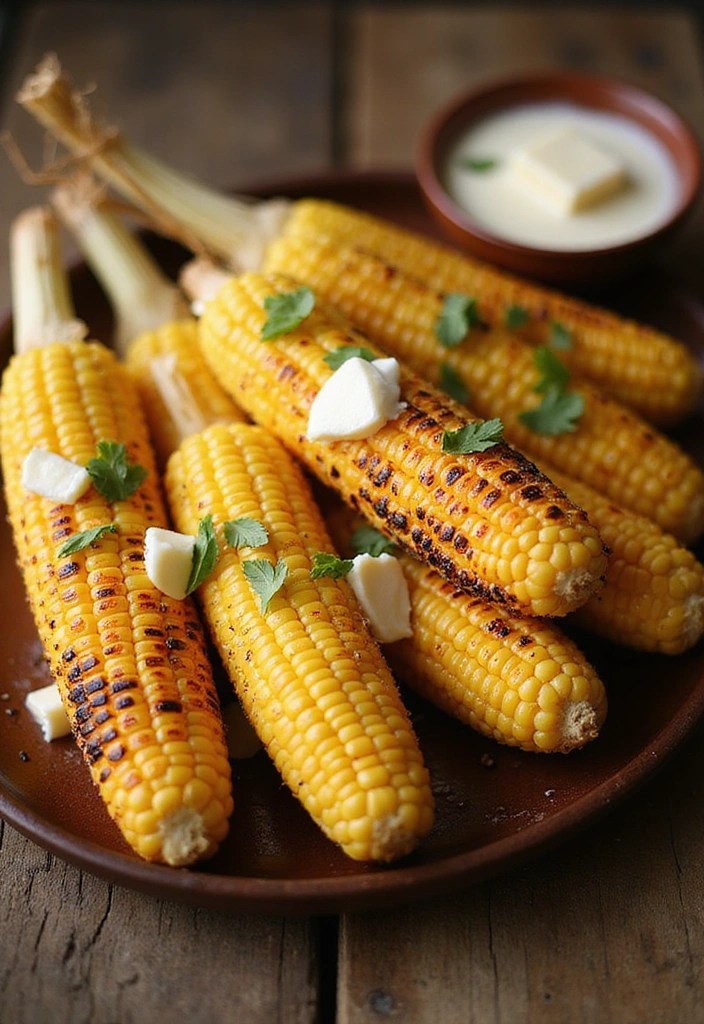
Grilled corn on the cob is a classic camping treat that brings a burst of sweetness and smoky flavor to your outdoor meals. It’s easy to prepare and fun to eat, making it a favorite among campers of all ages. Plus, with the right tools, like a grill basket, you can cook multiple ears at once without any hassle. Whether you choose to grill them in their husks or wrapped in foil with butter and seasonings, the result is always deliciously buttery corn that everyone will enjoy!
To make the experience even more enjoyable, consider using corn on the cob holders. These handy skewers keep your hands clean while allowing you to savor every bite without the risk of burning your fingers. For a flavor boost, elevate your grilled corn with cheese or a squeeze of lime, and don’t forget to use a flavored butter spreader for easy application of your favorite butter mixtures.
Recipe Overview:
– Servings: 4
– Prep Time: 10 minutes
– Cook Time: 15 minutes
– Total Time: 25 minutes
– Calories: 100 per serving
Nutrition Information:
– Protein: 3g
– Carbohydrates: 22g
– Fat: 1g
– Fiber: 2g
Ingredients:
– 4 ears of corn, husked
– 4 tablespoons butter
– Salt and pepper to taste
– Optional toppings: grated cheese, lime wedges
Step-by-Step Instructions:
1. Preheat your grill to medium-high heat.
2. Husk the corn and soak it in water for 10 minutes to prevent burning during grilling.
3. Place the corn directly on the grill and cook for 10-15 minutes, turning occasionally until the corn is tender and slightly charred.
4. Once cooked, remove the corn from the grill and brush each ear with butter. Season with salt and pepper, and add any optional toppings like grated cheese or lime wedges for a burst of flavor.
For Best Results:
– Grilling the corn with the husk on retains moisture and enhances the flavor.
– Consider using flavored butter, such as garlic or herb-infused, for an exciting twist.
Frequently Asked Questions:
– Can I use frozen corn? Fresh corn is ideal, but you can grill frozen corn after thawing it first.
– What’s the best way to store leftovers? Wrap any leftover corn tightly in foil and refrigerate for later enjoyment.
Product Recommendations:
6. Campfire Nachos
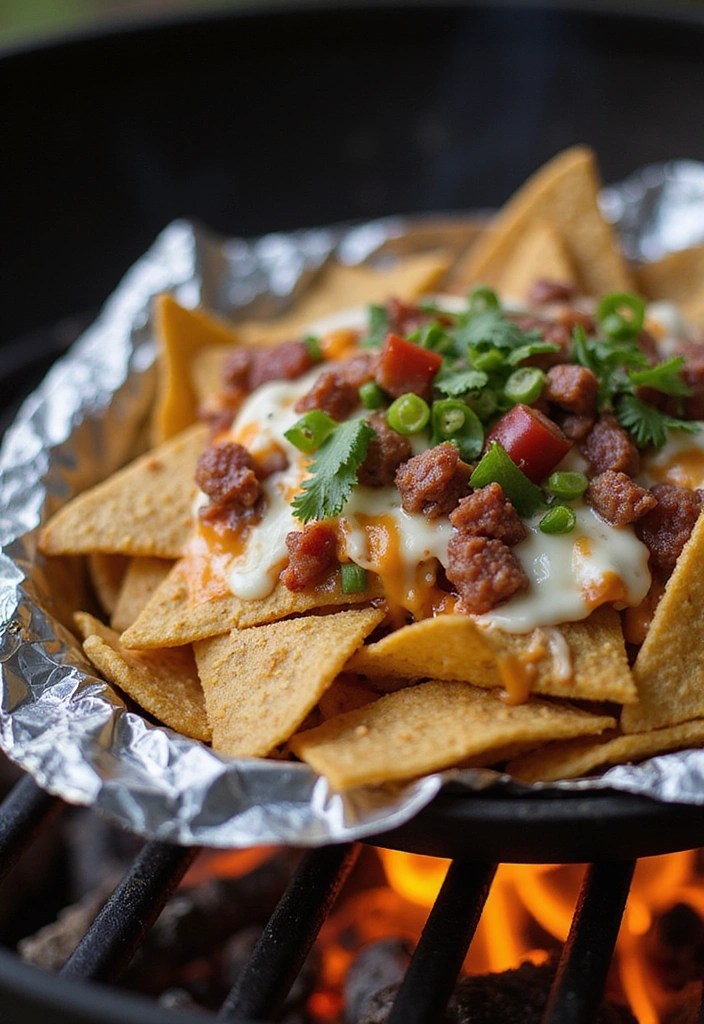
Campfire nachos are the perfect way to elevate your outdoor snacking game. Picture this: layers of crispy tortilla chips, gooey melted cheese, and a medley of toppings, all wrapped up and cooked over a crackling fire. It’s an easy and delicious treat that’s perfect for sharing with friends and family under the stars.
Not only are these nachos simple to prepare, but they also allow for personalization. Everyone can customize their own foil packet with their favorite ingredients. Just throw them on the grill or campfire for a few minutes, and you’ve got a deliciously cheesy delight that will have everyone coming back for more.
Recipe Details:
Ingredients:
– 4 cups tortilla chips
– 1 cup shredded cheese (cheddar or a mix)
– 1 can black beans, drained
– Optional toppings: jalapeños, diced tomatoes, olives, sour cream, salsa
– Aluminum foil
Step-by-Step Instructions:
1. Set up a large piece of aluminum foil and layer tortilla chips in the center.
2. Top with shredded cheese, black beans, and any desired toppings.
3. Fold the foil into a packet, sealing the edges tightly to keep everything inside.
4. Place the packet on the grill or campfire for about 10 minutes, or until the cheese is melted and bubbly.
5. Serve hot with salsa and sour cream for dipping and enjoy!
For Best Results:
– Use a mix of cheeses for the ultimate flavor experience.
– Consider adding a small amount of olive oil to the chips before layering to prevent sticking.
Product Recommendations:
• reusable silicone baking mats
7. Grilled Sausages with Peppers
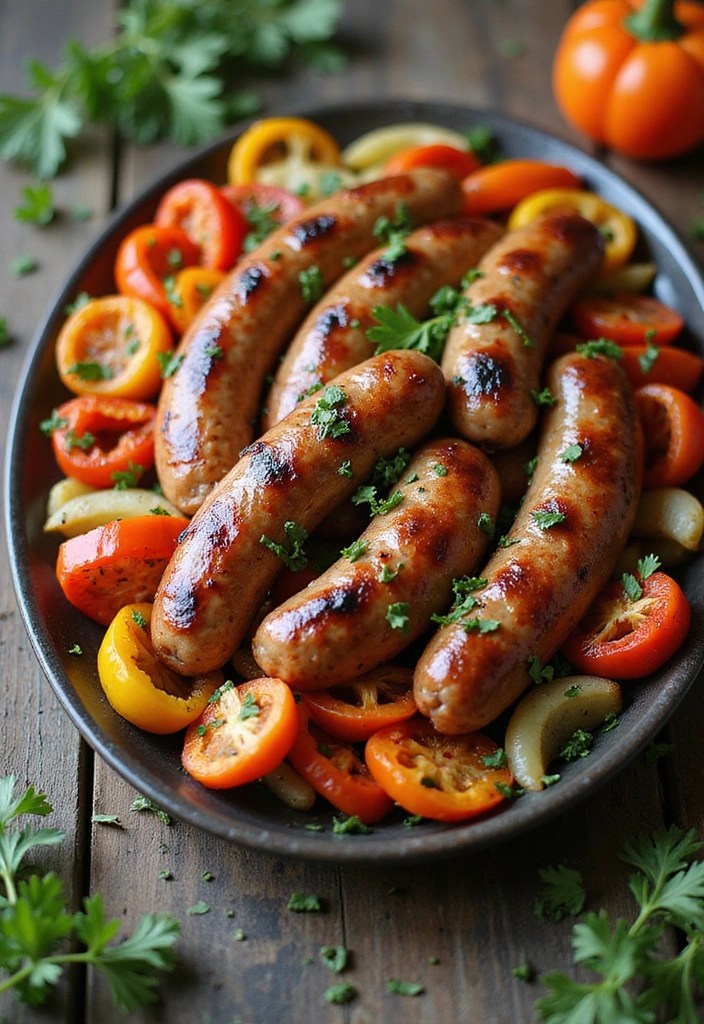
Grilled sausages with peppers are the perfect camping meal that brings a burst of flavor to your outdoor adventure. Whether you’re gathered around the campfire with friends or enjoying a quiet night under the stars, this dish is sure to satisfy. The combination of juicy sausages and sweet, grilled peppers creates a mouthwatering experience that even the pickiest eaters will love.
With just a few ingredients and simple steps, you can whip up this easy and delicious meal in no time. Let’s get started!
Ingredients:
– 4 sausages (bratwurst or Italian)
– 2 bell peppers, sliced
– 1 onion, sliced
– 2 tablespoons olive oil
– Salt and pepper to taste
Instructions:
1. Preheat the grill to medium-high heat.
2. In a skillet or a grill-safe foil packet, toss the sliced peppers and onions with olive oil, salt, and pepper.
3. Grill sausages for about 15-20 minutes until cooked through, turning occasionally to brown evenly. A grill basket for vegetables can help keep your peppers and onions from falling through the grates while they caramelize alongside the sausages.
4. Grill peppers and onions for about 10 minutes until tender and slightly charred.
5. Serve sausages with grilled peppers and onions on a bun or plate.
For the best results, always use a meat thermometer to ensure your sausages reach a safe internal temperature of 160°F. For an extra flavor boost, feel free to drizzle some barbecue sauce over your grilled sausages!
Product Recommendations:
8. Grilled Pineapple Dessert
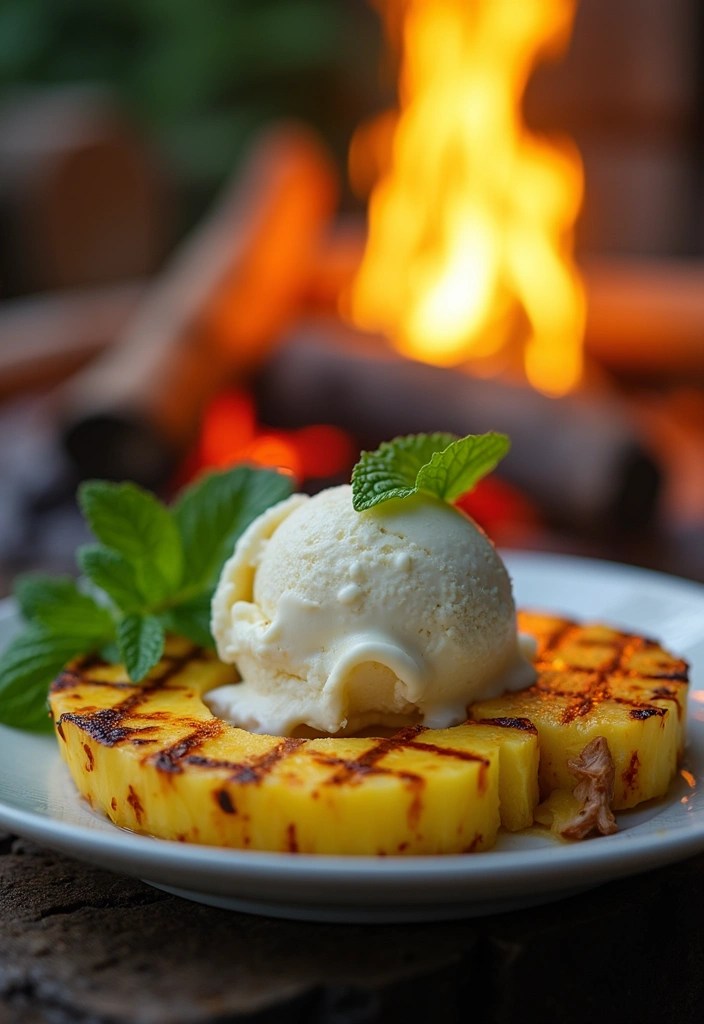
Grilled pineapple is one of the easiest and most delicious camping desserts you can whip up. The grilling caramelizes the sugars in the pineapple, giving it a delightful sweetness and beautiful char marks. To make this process even easier and more enjoyable, consider using a grill basket for vegetables and fruits to hold your pineapple slices securely while they cook, preventing them from slipping through the grates.
It’s the perfect way to end a day of camping adventures! Serve it with a scoop of vanilla ice cream or a drizzle of honey for an elevated treat. This simple dessert is sure to impress even the pickiest of sweet tooths!
Recipe Overview:
– Servings: 4
– Prep Time: 5 minutes
– Cook Time: 10 minutes
– Total Time: 15 minutes
– Calories: 80 per serving
Nutrition Information:
– Protein: 1g
– Carbohydrates: 20g
– Fat: 0g
– Fiber: 1g
Ingredients:
– 1 ripe pineapple, peeled and sliced
– 2 tablespoons brown sugar (optional)
– Vanilla ice cream for serving (optional)
Step-by-Step Instructions:
1. Preheat the grill to medium-high heat.
2. If desired, sprinkle brown sugar over the pineapple slices to enhance sweetness.
3. Grill pineapple slices for about 3–4 minutes on each side until caramelized and grill marks appear.
4. Serve warm, topped with a scoop of vanilla ice cream or drizzle with honey.
For best results, look for ripe pineapples for the sweetest flavor. If you want to make grilling even easier, consider using skewers for grilling to keep the slices together.
Frequently Asked Questions:
– Can I use canned pineapple? Fresh is best, but if you must use canned, drain well first.
– What other fruits can I grill? Peaches, nectarines, and watermelon all work great!
To enhance your camping grilling experience, a portable camping grill is an excellent addition. It’s convenient for the outdoors and ensures you have the right setup for a delicious grilled dessert. Enjoy!
Product Recommendations:
• Grill basket for vegetables and fruits
9. Grilled Stuffed Bell Peppers
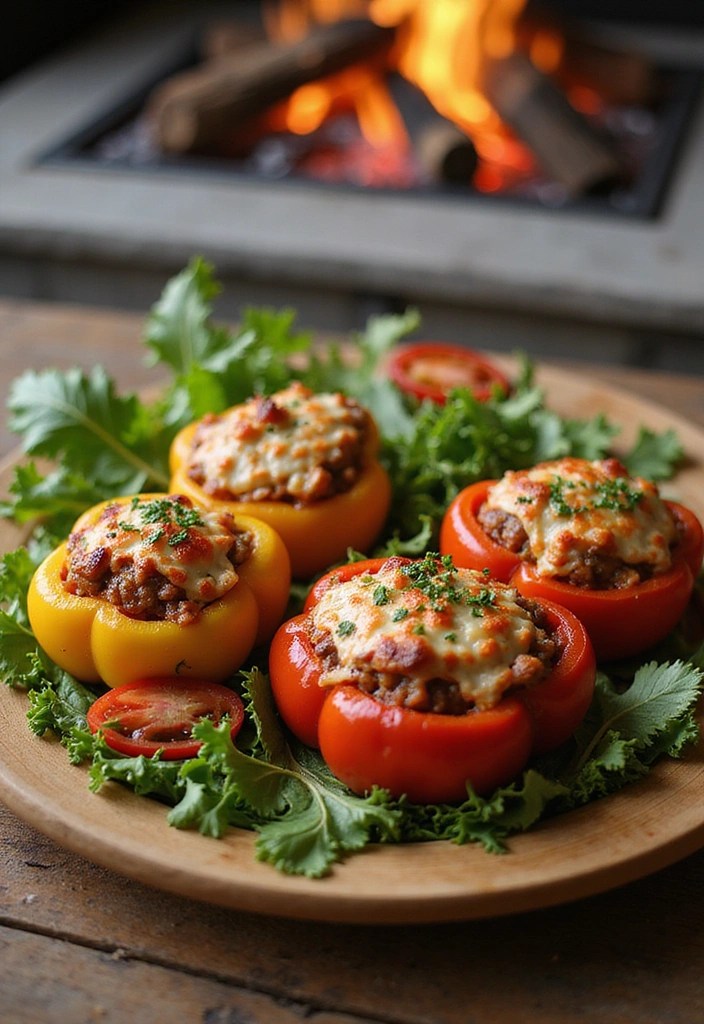
Grilled stuffed bell peppers are a fantastic way to enjoy a healthy meal while camping. Not only are these colorful peppers delicious, but they can also be filled with rice, beans, cheese, or any protein you prefer, creating a hearty dish that’s both nutritious and satisfying. Once grilled, they become tender and infused with smoky flavors that make them irresistible. For added convenience, you can prepare the stuffing at home and just assemble and grill when you reach your campsite.
To make your grilling experience even better, consider using a portable camping grill. This compact grill is perfect for camping trips, ensuring you can easily cook your stuffed peppers anywhere. With its locking lid and dual venting system, you can achieve the ideal cooking temperature for those perfectly grilled peppers.
Ingredients:
– 4 bell peppers (any color)
– 1 cup cooked rice
– 1 cup canned black beans, rinsed
– 1 cup shredded cheese (cheddar or mozzarella)
– 1 teaspoon taco seasoning
Step-by-Step Instructions:
1. Preheat grill to medium-high.
2. Cut the tops off the peppers and remove the seeds.
3. In a bowl, mix cooked rice, black beans, cheese, and taco seasoning.
4. Stuff each pepper with the filling and place on the grill.
5. Grill for about 20 minutes until the peppers are tender and cheese is melted.
For best results, use a combination of cheeses for extra creaminess or experiment with different fillings like quinoa or ground turkey. To keep your ingredients fresh and organized, consider using reusable silicone food storage bags. These environmentally friendly bags are perfect for storing your prepped ingredients, making your campsite cooking seamless and enjoyable.
Frequently Asked Questions:
– Can I prepare these ahead of time? Yes, just store ungrilled peppers in a container in the cooler.
– What if I don’t have a grill? You can bake them in a camp oven!
To enhance your grilling experience, don’t forget to pack a reliable grilling utensil set. This set includes essential tools like a spatula and tongs, ensuring you have everything you need to grill your stuffed peppers to perfection while enjoying your time outdoors.
Product Recommendations:
• reusable silicone food storage bags
• reliable grilling utensil set
10. Campfire Chili

Warm up your camping experience with a hearty campfire chili! This dish is perfect for chilly nights and packed with protein and fiber to keep everyone satisfied. You can make it in a large pot over the fire, allowing flavors to meld beautifully. Customize your chili with your choice of meat, beans, and spices to cater to every taste. Serve it with cornbread for a true camping feast that will have everyone coming back for seconds.
Recipe Details:
Ingredients:
– 1 pound ground beef or turkey
– 1 can kidney beans, drained
– 1 can diced tomatoes
– 1 onion, chopped
– 1 tablespoon chili powder
– Salt and pepper to taste
– Optional toppings: shredded cheese, sour cream
Instructions:
1. In a large pot, brown the ground meat over the campfire.
2. Add the chopped onion and sauté until softened.
3. Stir in the diced tomatoes, kidney beans, chili powder, salt, and pepper.
4. Let the mixture simmer for about 40 minutes, stirring occasionally.
5. Serve hot, topped with cheese and sour cream if desired.
For best results, pre-chop the veggies at home to save time. You can also add more beans for a meat-free version!
If you’re looking for a portable cooking option, consider using a compact stove, which makes it easy to whip up this delicious chili no matter where you are.
Product Recommendations:
11. Grilled Fish Tacos
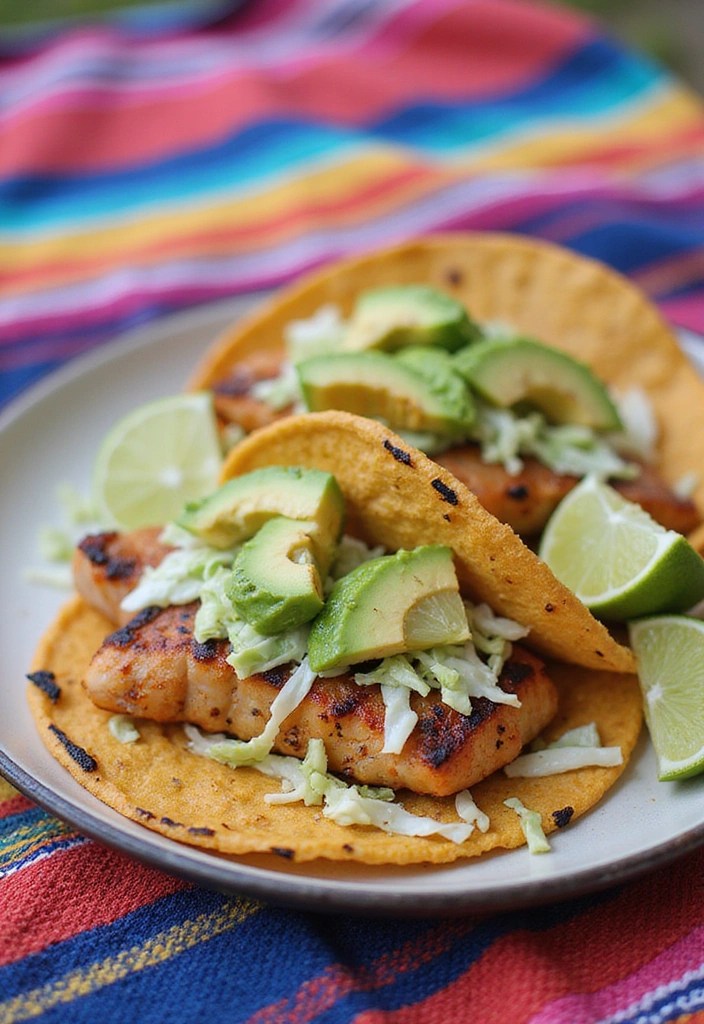
Grilled fish tacos are a fantastic option for those sunny camping days. The fresh and zesty flavors come together beautifully, making this dish not only satisfying but also easy to prepare. Using light white fish like tilapia or cod ensures a delicate, flaky filling that pairs perfectly with vibrant toppings.
Marinating the fish in lime juice and spices elevates the flavor profile, while a fish grilling basket helps keep everything intact on the grill. With the addition of crunchy cabbage and a creamy drizzle, these tacos are sure to impress even the pickiest eaters.
Ingredients:
– 1 pound white fish fillets (tilapia or cod)
– 2 tablespoons olive oil
– 2 tablespoons lime juice
– 1 teaspoon cumin
– Salt and pepper to taste
– Corn tortillas
– Toppings: shredded cabbage, avocado, cilantro, lime wedges
Step-by-Step Instructions:
1. In a bowl, combine olive oil, lime juice, cumin, salt, and pepper. Add the fish fillets and marinate for 10 minutes.
2. Preheat your grill to medium-high heat. Cook the marinated fish for about 4-5 minutes on each side until it flakes easily with a fork.
3. While the fish is grilling, warm the corn tortillas on the grill for about 30 seconds on each side, just until pliable.
4. Once the fish is cooked, remove it from the grill and let it rest for a minute. Then, flake the fish into bite-sized pieces.
5. Assemble your tacos by placing the flaked fish onto the warm tortillas and adding your favorite toppings, such as shredded cabbage, avocado slices, and fresh cilantro. Squeeze lime juice over the top for an extra zing.
For Best Results:
– Utilize a fish basket or wrap the fish in foil to prevent it from falling apart while grilling.
– For a burst of freshness, consider adding diced tomatoes or sliced jalapeños for a spicy kick.
Frequently Asked Questions:
– Can I use frozen fish? Yes, just be sure to thaw it completely before marinating.
– What if I want a spicier kick? Add sliced jalapenos to the toppings!
Product Recommendations:
12. Grilled Cheese and Bacon Sandwiches

When it comes to camping comfort food, few things are as satisfying as a grilled cheese and bacon sandwich. This classic dish combines the crispy goodness of bacon with the gooey deliciousness of melted cheese, all tucked between two slices of perfectly grilled bread. Whether you’re sharing with family or savoring it solo, this easy and delicious recipe is a hit around the campfire.
To elevate your cooking experience, consider using a portable camping grill that locks in heat or a versatile cast iron skillet that can handle any heat source. A reliable grilling spatula will also make flipping the sandwiches a breeze, ensuring you achieve that perfect golden-brown crust.
Here’s how to make your own mouthwatering grilled cheese and bacon sandwiches:
Ingredients:
– 8 slices of bread (your choice)
– 8 slices of cheese (cheddar or your favorite)
– 8 slices of cooked bacon
– Butter for grilling
Step-by-Step Instructions:
1. Heat your portable camping grill or cast iron skillet over medium heat.
2. Butter one side of each slice of bread.
3. Layer cheese and bacon between two slices of bread, ensuring the buttered sides are facing out.
4. Grill the sandwiches for 3-4 minutes on each side or until they are golden brown and the cheese has melted beautifully.
5. Remove the sandwiches from the heat, slice them into halves or quarters for easy sharing, and serve hot!
For Best Results:
– Experiment with a mix of cheeses for added flavor.
– Keep a close watch on the heat to avoid burning the bread.
Frequently Asked Questions:
– Can I use turkey bacon? Absolutely! Just make sure to cook it thoroughly before adding it to your sandwiches.
– What can I substitute for bread? Try using tortillas for a fun twist!
Product Recommendations:
13. Grilled Caprese Salad Skewers
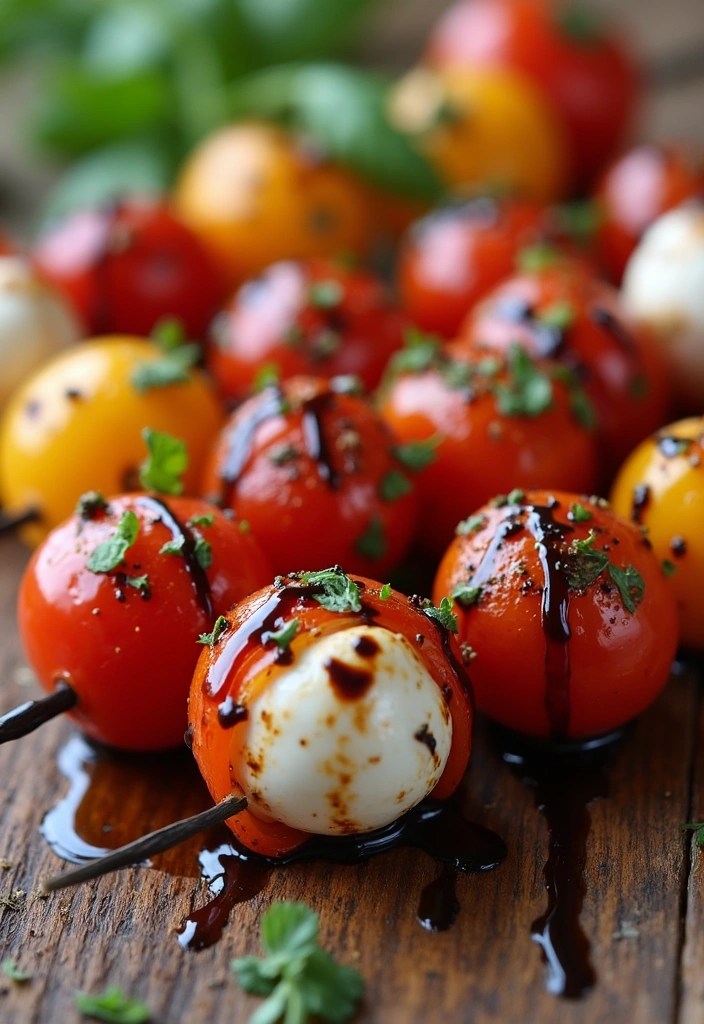
Grilled Caprese salad skewers are a delightful and easy option for your next camping trip. With their vibrant colors and fresh flavors, these skewers will not only satisfy your taste buds but also impress your fellow campers. The combination of juicy tomatoes, creamy mozzarella, and aromatic basil, all enhanced by a touch of smokiness from the grill, creates a refreshing appetizer that’s perfect for any outdoor gathering.
These skewers can be prepared in no time and are great for sharing. Whether you’re cooking over an open fire or a portable grill, they’re sure to be a hit. Drizzling them with balsamic glaze adds an elegant finish that elevates this simple dish into something truly special.
Ingredients:
– 16 cherry tomatoes
– 16 mozzarella balls (bocconcini)
– Fresh basil leaves
– 2 tablespoons balsamic glaze
– Salt and pepper to taste
– Wooden skewers
Step-by-Step Instructions:
1. Prepare the Skewers: Thread cherry tomatoes, mozzarella balls, and basil leaves onto skewers, alternating the ingredients for a beautiful presentation.
2. Season: Drizzle with olive oil, and sprinkle salt and pepper to taste.
3. Grill: Preheat your grill. Grill the skewers for about 5 minutes, turning occasionally until the cheese is slightly melted and the tomatoes are warmed through.
4. Finish and Serve: Drizzle with balsamic glaze before serving to add a burst of flavor and a touch of elegance.
For Best Results:
– Always opt for fresh ingredients to enhance the flavor.
– Soak your wooden skewers in water for at least 30 minutes before grilling to prevent them from burning.
Frequently Asked Questions:
– Can I use larger tomatoes? Yes, but make sure to cut them into smaller pieces to fit on the skewers.
– What’s a good alternative to mozzarella? Feta cheese works wonderfully in this salad for a different flavor profile.
Enjoy these easy and delicious grilled Caprese salad skewers on your next camping adventure and watch as they become a favorite among even the pickiest eaters!
Product Recommendations:
Conclusion
From savory grilled proteins to delightful veggie sides and sweet treats, these grilled camping recipes are sure to liven up your outdoor gatherings. Each dish combines easy preparation with mouthwatering flavors, aimed to satisfy even the pickiest of eaters.
So, pack your grill and get ready to impress your friends and family with these delicious meals under the stars. Camping has never tasted so good!
Note: We aim to provide accurate product links, but some may occasionally expire or become unavailable. If this happens, please search directly on Amazon for the product or a suitable alternative.
This post contains Amazon affiliate links, meaning I may earn a small commission if you purchase through my links, at no extra cost to you.

Leave a comment